
Jump to content
  • Welcome to Midlands Lotus Owners Club (MLOC)

    Register now to gain access to all of our features. Once registered and logged in, you will be able to contribute to this site by submitting your own content or replying to existing content. You'll be able to customize your profile, receive reputation points as a reward for submitting content, while also communicating with other members via your own private inbox, plus much more!

    This message will be removed once you have signed in.

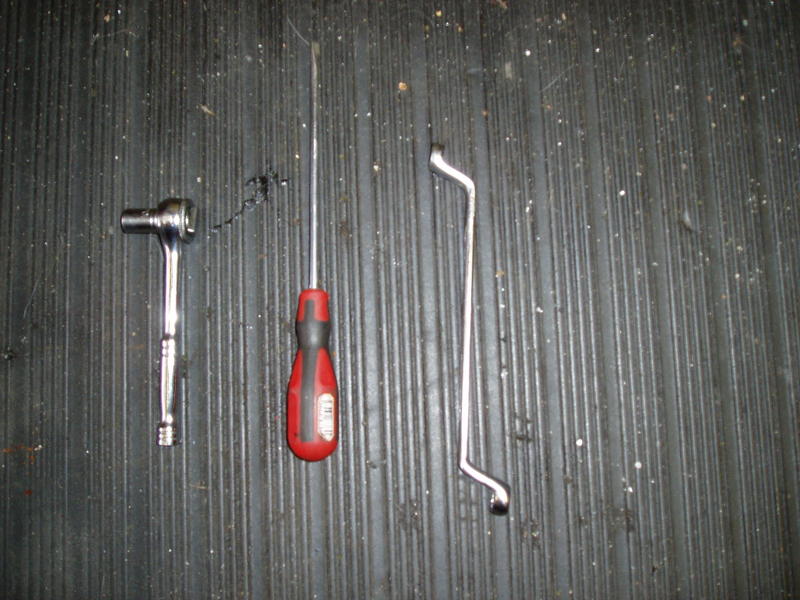
Here we go then. I've decided its time to change my waist seal rubbers on the Elise. They have started bubbling with rust. As im a real GJOB at heart this annoyed me enough to buy 2 new ones. £56 each from your Lotus dealer wacko.gif This first pic might seem a bit daft and it probably is. Its the tools ive used so far. 1/4 drive rachet with a 10mm socket. For the middle and back nuts that retain the window brackets. A screwdriver for removing the waist seal retaining clips. A 10mm crows foot ring spanner. This is to get at the front nut which is the PITA one. This is by far the best tool to use ive found. With a normal spanner you will struggle.
Window1.jpg


First wind the window right down and pull off the inner door seal like this. Its only a push fit but might have a bit of glue in to hold it on.


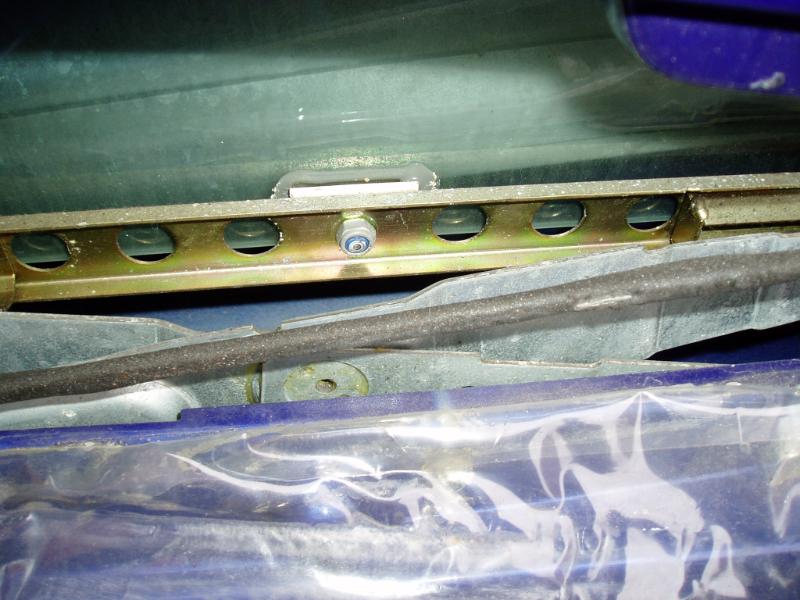
Next remove the door card and carefully pull down the plastic sheet underneath. You have to replace this after. Mine was held in with what looks like a bit of Silicon. This should reveal the 3 nuts that hold the window in. This is the middle one. You may have to wind the window up or down so you can get at them.


Window2.jpg


Remove the 3 nuts. As i said the middle and rear are easy. The front one is not. The way i did it was to wind the window right up. You can then look down through the front of the window and guide the crow foot spanner on from inside the door. You will need some patience. Once you have done that, pull the 3 brackets and studs off the bottom supporting rail and lift the window out. Tilting it backwards i found is the easiest way.


Window3.jpg


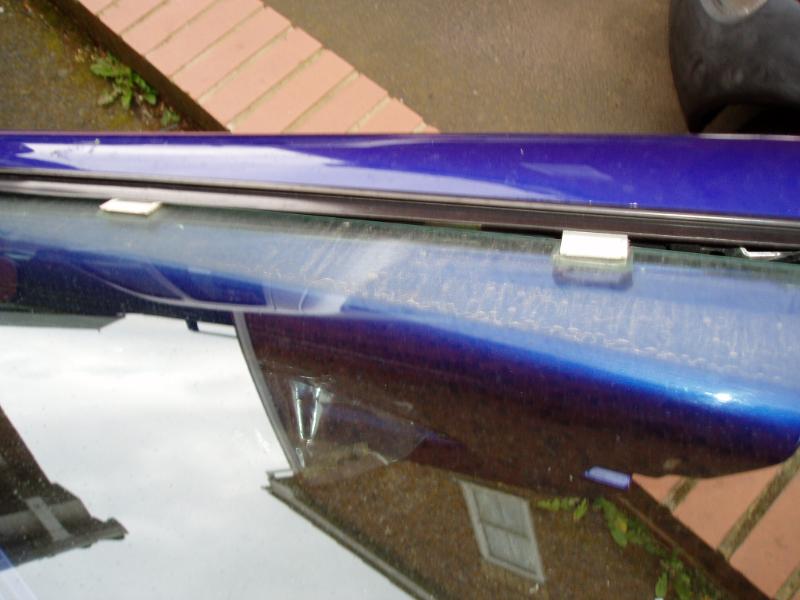
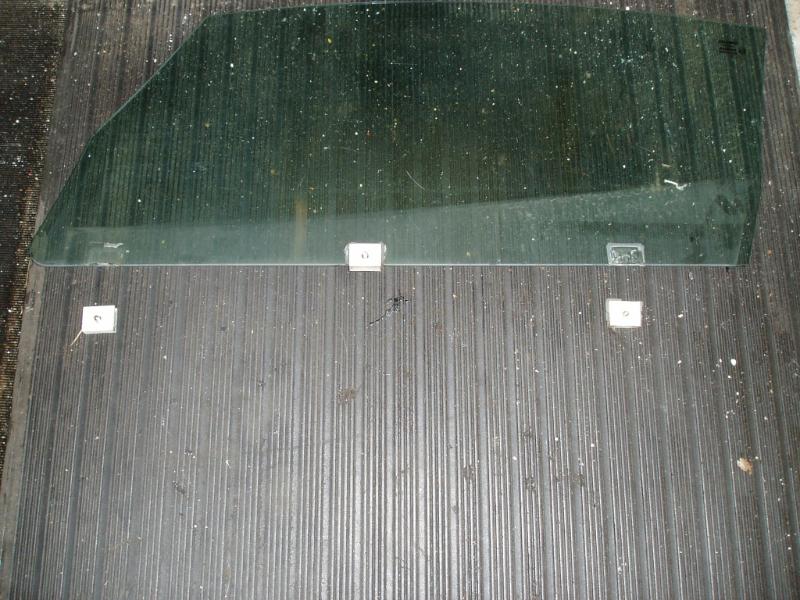
If your really lucky wacko.gif you will find a couple of them have come unstuck so you can do a proper job of it biggrin.gif As in this pic.


Window4.jpg


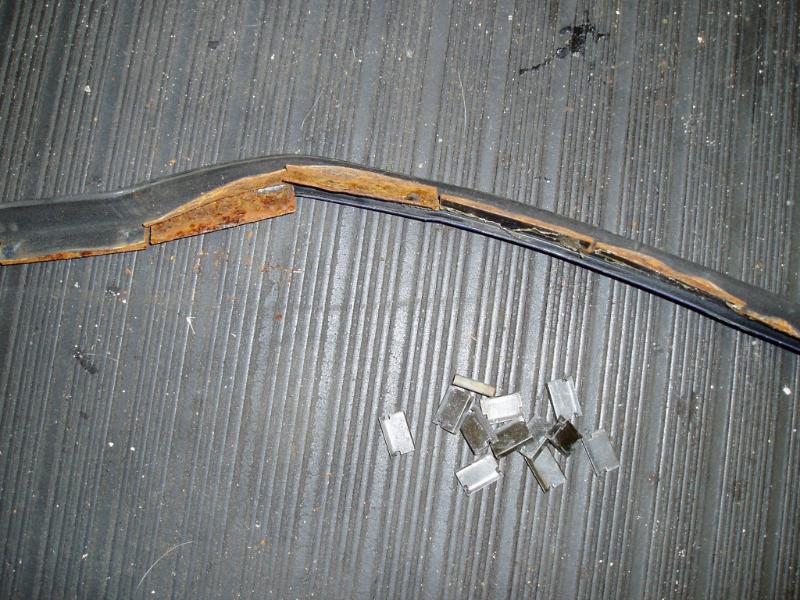
More of that later. These are the clips that hold in the waist seal. I pushed them down with a screwdriver and caught them. This was surprisingly easy.


This is the old one off the car showing the rust inside. The new ones are aluminium inside so should be better.


Window5.jpg


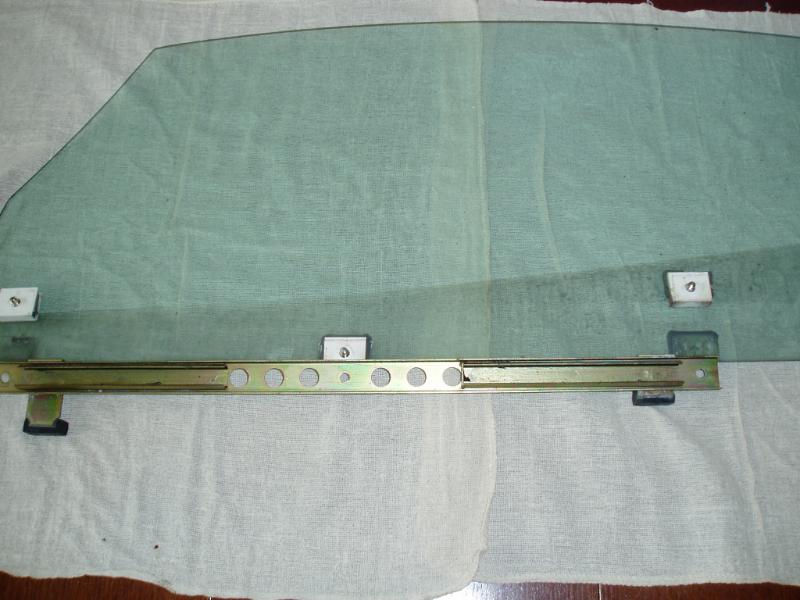
Right now Liz has gone out ive retired to the kitchen table in the warm smile.gif You can also remove the Window support rail once the window is out as in this pic. It runs on a couple of nylon rollers on the winder mechanism.


Window6.jpg


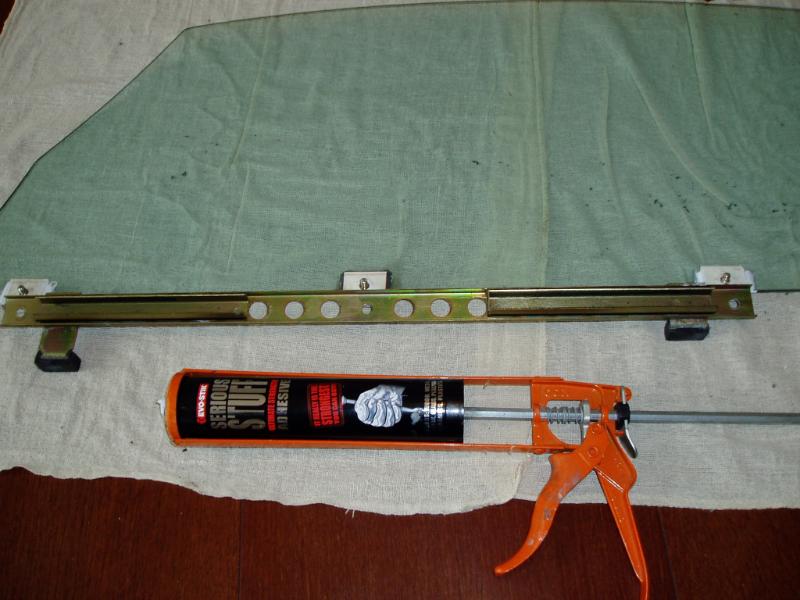
All you have to do then is clean all the old glue off the window. I used a kitchen knife. I also used the holes in the rail to realign the brackets to glue them back on. If you have to glue all 3 back on you can mark the position of the brackets on the window using some tape. Here it is done waiting to dry. I used Evo stick seriously strong stuff glue. I used this on the passenger side a while ago and its still stuck so it seems ok.


Window7.jpg


After you have taken the seal off the door you are left with this mess. The seal was also stuck on with a bit of Silicon or something. I removed the mess with white spirit and elbow grease.
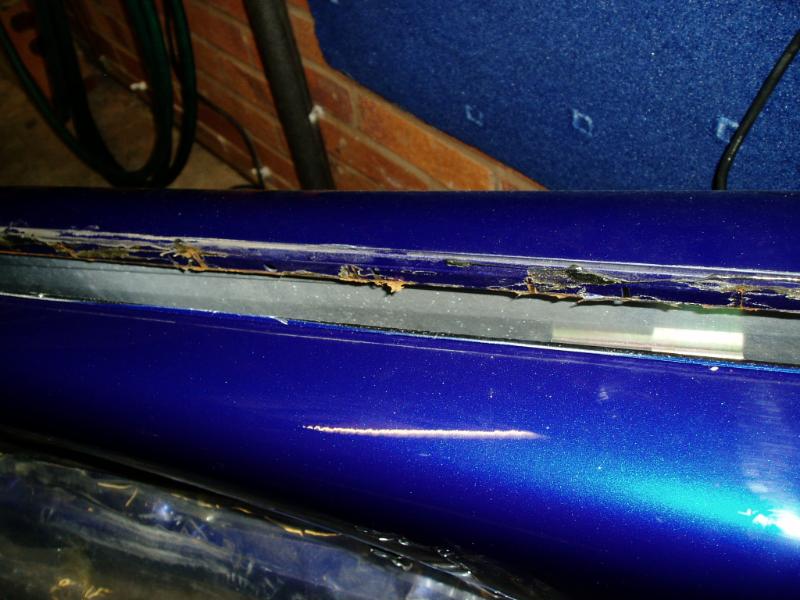
 

Window8.jpg


I also put a small bead of bathroom clear silicon on the new seal like so.
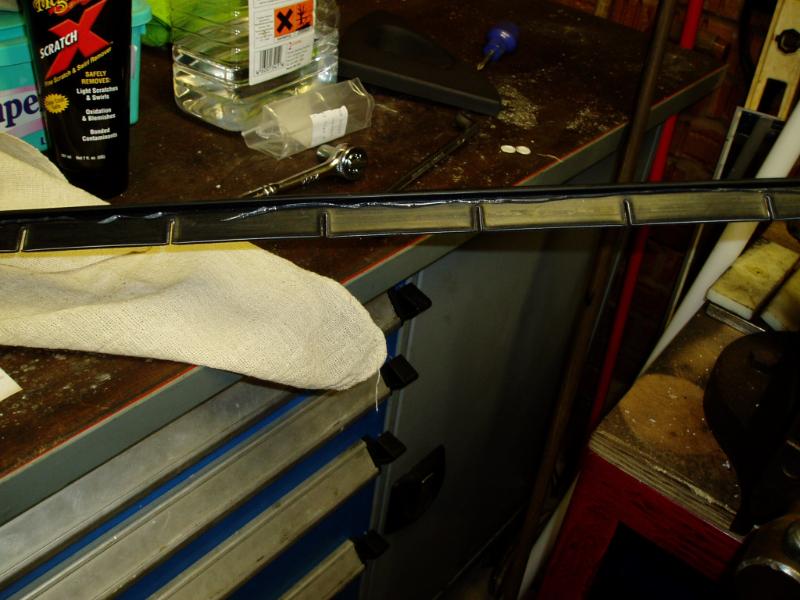


Window9.jpg


Now for the slightly tricky bit, the retaining clips. I found the best way was to open the clips slightly with a suitable sized screwdriver ( same one :-) ) You have to make sure the clips go over the door inner lip as well as the seal. When they are in position remove the screwdriver. You might be able to find a easier way but it worked for me. Dodgy pic but it gives you a idea.
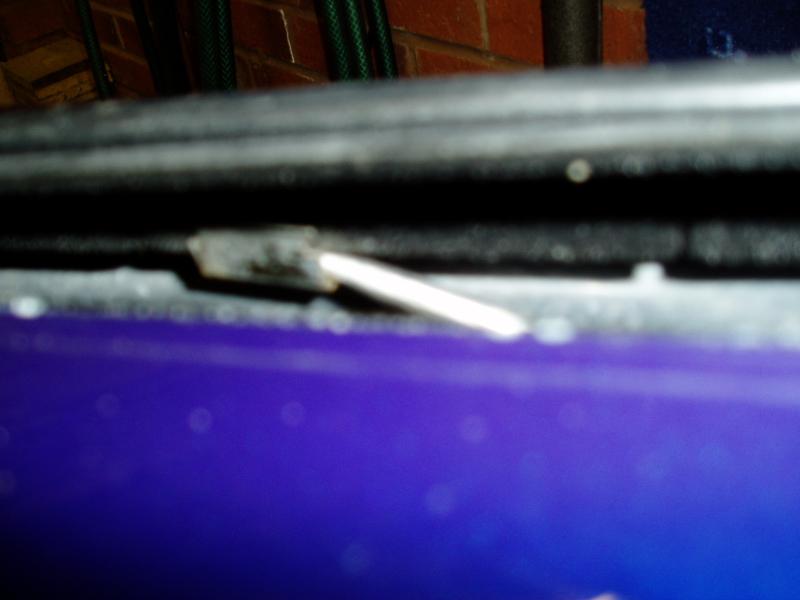


Window10.jpg


A pic of the new seal in place. It looks a lot better.
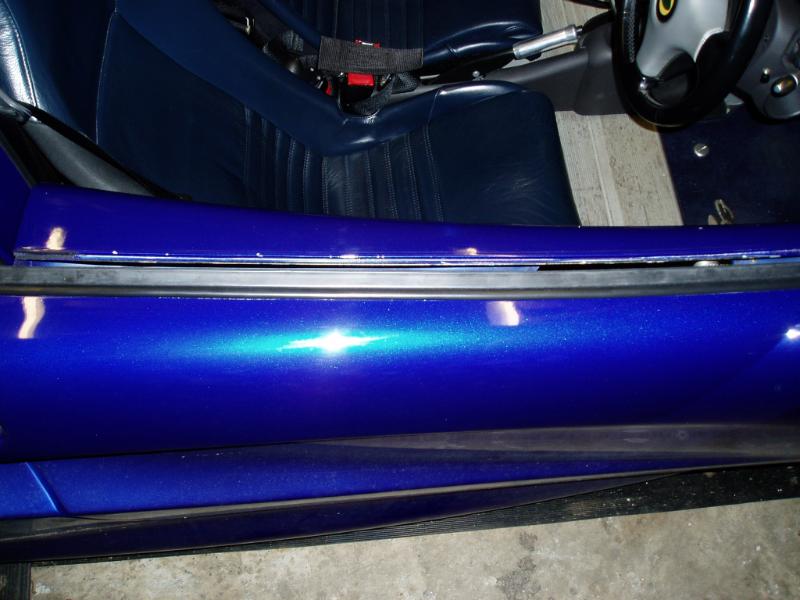


Window11.jpg


Something I nearly forgot. Also make sure the front and rear glass guide channels still have the rubber / felt liners in place. These can get out of position and / or fall out. This causes the window to rattle as well. A dodgy pic of the rear channel but it gives you an idea.


Window12.jpg


A Final pic now its finished and all back together smile.gif Also a tip to get the front nut back on. I stuck it to the end of my finger using a blob of grease. It worked for me. Have fun tongue.gif
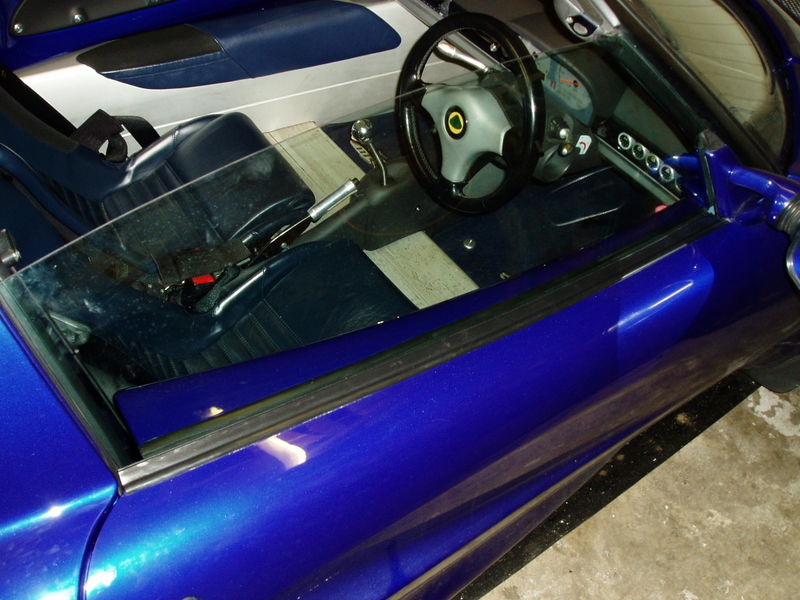



Window13.jpg


User Feedback

Recommended Comments

There are no comments to display.


Join the conversation

You can post now and register later. If you have an account, sign in now to post with your account.

Guest
Add a comment...

×   Pasted as rich text.   Paste as plain text instead

  Only 75 emoji are allowed.

×   Your link has been automatically embedded.   Display as a link instead

×   Your previous content has been restored.   Clear editor

×   You cannot paste images directly. Upload or insert images from URL.


  • TRD Airbox for Elise

    Hi, Apologies if this has been answered recently - I've just joined and couldn't find anything in the search.   I've recently bought a 2018 Elise Sport 220 which I've been enjoying hugely. About the only thing I'd like to change is the sound, and I've read that a TRD airbox is a big improvement. The problem, of course, is I have also read they are no longer made and I can't find any in stock either. So does anyone have any suggestions: - where might I be able to find one?

    nick_t
    nick_t
    Technical Talk 13

    Evora 400 Audio Upgrade?

    Hi Guys It took me over a couple of hours to drive back from LiTP because of traffic etc. Its the first time I tried listening to the stereo and it was pretty dismal. I did some research and it turns out my car left the factory without the rear amp, subwoofer, cabling and brackets so I'm probably looking to install a mini amp, sub and upgrade the front speakers as apparently they are very poor. Just wondering if anyone else has done anything similar to their Evora and what they did. Wo

    Jas
    Jas
    Technical Talk 2

    Poster for the 2027 Lotus in the Peaks.

    As I’m sure many of you will be pleased to hear, the work has started for 2027 Lotus in the Peaks. Paul (Oakman) had a fantastic idea for next years poster, so today we banded a few cars together and went out to do the photo shot. I happened to leave my dashcam running.  Enjoy   Photoshoot.mp4

    PJT
    PJT
    General Talk 17

    Elise K Series Upgrade

    Hello All. Hopefuley this all ends well with a bit more power in the back. I have a 04 plate Rover S2. it says 'S' on the V5 which should be Supercharged. But its very much not. Its claim to fame is being January 2026 in the MLOC calendar My plan. Find a 160 K Series and engin swap. What could posibly go wrong... I would like to blog this for 2 reason. 1. People may be interested in doing the same. 2. People may be able to support when I am being a bit silly (This wi

    William D8on
    William D8on
    Technical Talk 68

    Adventures of an S1 Elise in Germany

    Some of you will know, but for the rest, I'll be working in Germany near Mannheim until end of 2026 with 75% of my time there, and 25% back home. As i fancy doing some different roads, and I've booked two weekend driving tours with Delightful Driving company (run by Elisa Artioli), on Thursday 10th July I'll be setting of in my S1 Elise, and 4 days later I plan to arrive at my apartment. I plan to post about my driving adventures over there, so keep an eye on this blog should you be in

    Badger02
    Badger02
    Touring 105
  • MLOC classifieds

    There have been no adverts submitted yet

  • MLOC garage

  • Member Statistics

    4,628
    Total Members
    4,445
    Most Online
    zhelinm
    Newest Member
    zhelinm
    Joined
×
×
  • Create New...