Jump to content

litp.jpg

Lotus in the Peak
28th - 30th June 2024
  • Welcome to Midlands Lotus Owners Club (MLOC)

    Register now to gain access to all of our features. Once registered and logged in, you will be able to contribute to this site by submitting your own content or replying to existing content. You'll be able to customize your profile, receive reputation points as a reward for submitting content, while also communicating with other members via your own private inbox, plus much more!

    This message will be removed once you have signed in.

How do I bleed my brakes?


Ladders

It is possible to bleed the brakes using the traditional 2 person technique (1 pushing the pedal and 1 controlling the flow through the nipple) however a pressure bleeding system (such as a Gunsons Eezi-bleed) makes it a relatively easy 1 person job. The basic procedure with an Eezi-bleed is as follows:-


  • Fill Eezi-bleed bottle.
  • Connect Eezi-bleed cap to resevoir
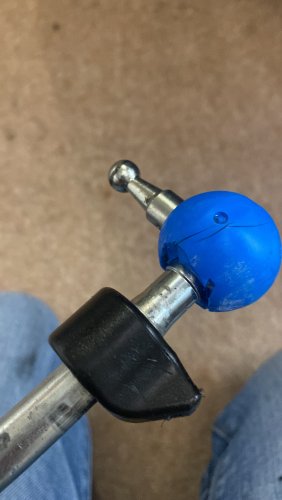
  • Connect air pressure feed to tyre (checking for leaks).
  • With a clear hose attached and feeding into a jar, undo bleed nipple using a ring spanner. Continue until fluid is bleeding clear and without bubbles. Nip up the bleed nipple.
  • Repeat for all corners, possibly going round the set a couple of times. The usual procedure is to start with the longest brakelines, i.e. nearside-rear, offside-rear, nearside-front, offside-front.
  • Keep checking the Eezibleed resevoir. If you need to top it up DONT FORGET TO TAKE OFF THE AIR SUPPLY before removing the top!
  • When done disconnect air supply and remove Eezibleed.
  • Use a torque wrench to tighten the bleed nipples (if you have a torque to set them to and a wrench available). You can do this by hand, but it is tempting to overtighten them.
  • Give the nipples a spray with brake cleaner to clear them and the calipers of excess fluid.
  • Try the brake pedal.
  • Check the calipers/nipples for any signs of leakage.
  • Top up resevoir and replace cap.

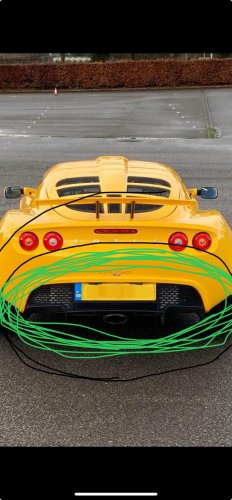
The biggest problem bleeding a dry system (e.g. following following a brake hose or caliper change) is removing air from the front calipers. The layout of the front caliper is such that there is a void in one half of the caliper thats is difficult to bleed with the caliper in the fitted position. Arguably the best way to remove air in this pocket is to remove the caliper from the upright and bleed the caliper whilst rotating it in a steady 360deg arc, repeating the process until no further air bubbles come out and the pedal becomes firm.


User Feedback

Recommended Comments

There are no comments to display.


Join the conversation

You can post now and register later. If you have an account, sign in now to post with your account.

Guest
Add a comment...

×   Pasted as rich text.   Paste as plain text instead

  Only 75 emoji are allowed.

×   Your link has been automatically embedded.   Display as a link instead

×   Your previous content has been restored.   Clear editor

×   You cannot paste images directly. Upload or insert images from URL.


  • S1 Type 49 Elise Refresh

    And so the winter refresh of my S1 Elise started today. Hoping to take front clam of tomorrow. However of the 4 lower bolts that hold the lower rear to the chassis, 2 are spinning and 2 won't budge despite copious amounts of penetrative oil over the last few months. The Eagle eyed will spot my Dremel tool which I'm not looking forward to using to remove 4 bolt heads that have limited access. Currently on my list are replacing the driving lights brackets, shot blast and paint the tow post, n

    Badger02
    Badger02
    Technical Talk 230

    Buffing up weathered/aged plastic - Bumper Trim Gel. Magic stuff!!

    So my plastic trim was starting to look a bit weathered. I know the back to black stuff works to a degree, but the Auto Glym Bumper and Trim gel is super.  Did the front, side and rear grilles. AND the headlight edges were looking poor and aged. Thought I may have to re paint, costs a fortune to get them done properly, but the Auto Glym made them look fabulous! Barely see the worst of it now...... Well pleased with the results..... P.S drag and drop make the images download, dont

    Dave-hp
    Dave-hp
    Technical Talk 1

    Exige S with 380/410 valved exhaust

    Sounded bloody lovely!!  Not sure it would get past trackday noise limits though!!! Anyone got one fitted to their Exige?  Is it as good as it sounds?

    Guido
    Guido
    Technical Talk

    Elise Cup Front Splitter

    Hello everyone,  It has been a while since I've made a post. It's finally that time of year that the car is coming out more frequently and for some reason I seem to have back luck with my front splitter. I was wondering if fellow or ex Elise Cup owners could shed some light onto how you manage to keep the splitter in good nick? It's a little deflating when it bottoms out or hits something and you step out the car and see the damage.  Any suggestions welcome 🙂,  Iowan

    IowanF1999
    IowanF1999
    Technical Talk 3

    Tyre Quandry - New Elise

    I went to see a ‘new’ Lotus today. It was bloody lovely. It’s a 15 plate so around 8-9 years old. Fitted to it were Yoko Advans AD07 front and rear. The front ones were 175/55R16 which you can’t get anymore (195/50R16 seems to be the option for fronts). Either way, by my man-maths, the tyres must be as old as the car. The date stamp on one of the fronts and one of the rears was 4814 so made end of Nov ‘14. The previous owner tracked it a lot so I’m assuming he used a 2nd set of wheels/tyres and

    Guido
    Guido
    Technical Talk 33
  • MLOC classifieds

  • MLOC garage

  • Member Statistics

    4,224
    Total Members
    1,800
    Most Online
    ssb
    Newest Member
    ssb
    Joined
×
×
  • Create New...

Important Information

We have placed cookies on your device to help make this website better. You can adjust your cookie settings, otherwise we'll assume you're okay to continue. Terms of Use