


Entry posted by mambosasa
2,075 views
I have been looking forward to this for some time. The moment when I start heading the other way and install bits back on the car.
As customary, I first like to thank they guys who gave up their time and helped me today..
So, thanks go out to Martin R - Dependable and as reliable as...well a Japanese engine
And Jason, my little Nephew (with world's fastest car - 1.6 Nova ![]() )
)
The installation
On Friday, I was relieved to see the delivery van pull up at the house, bearing a box of goodies.
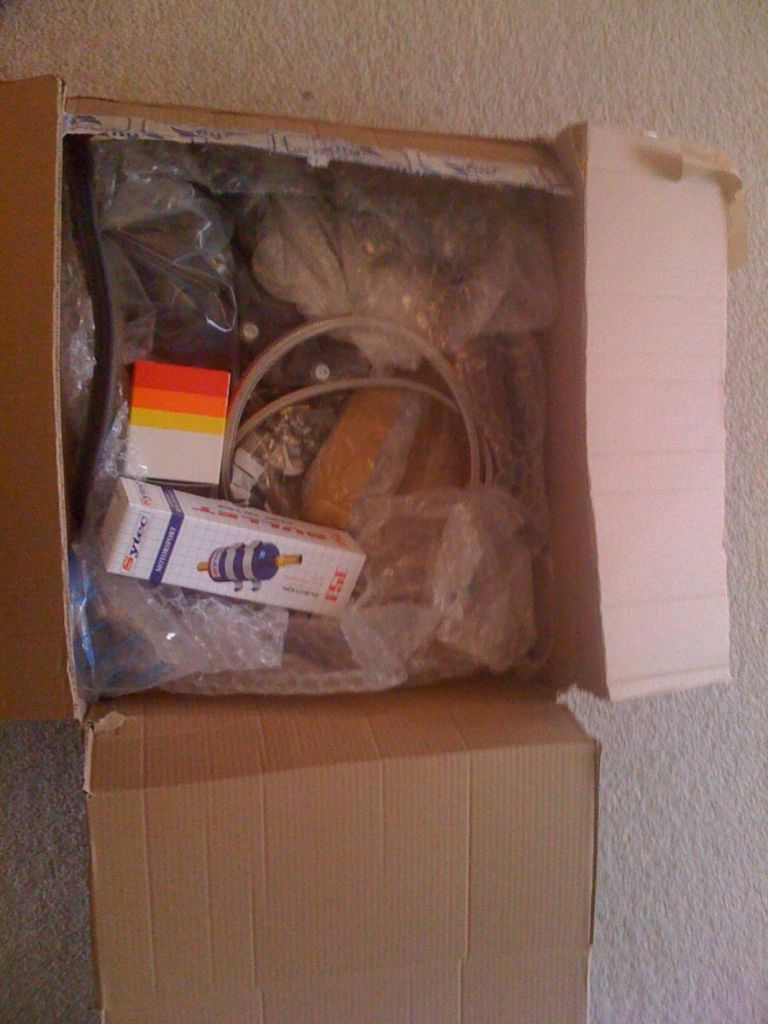
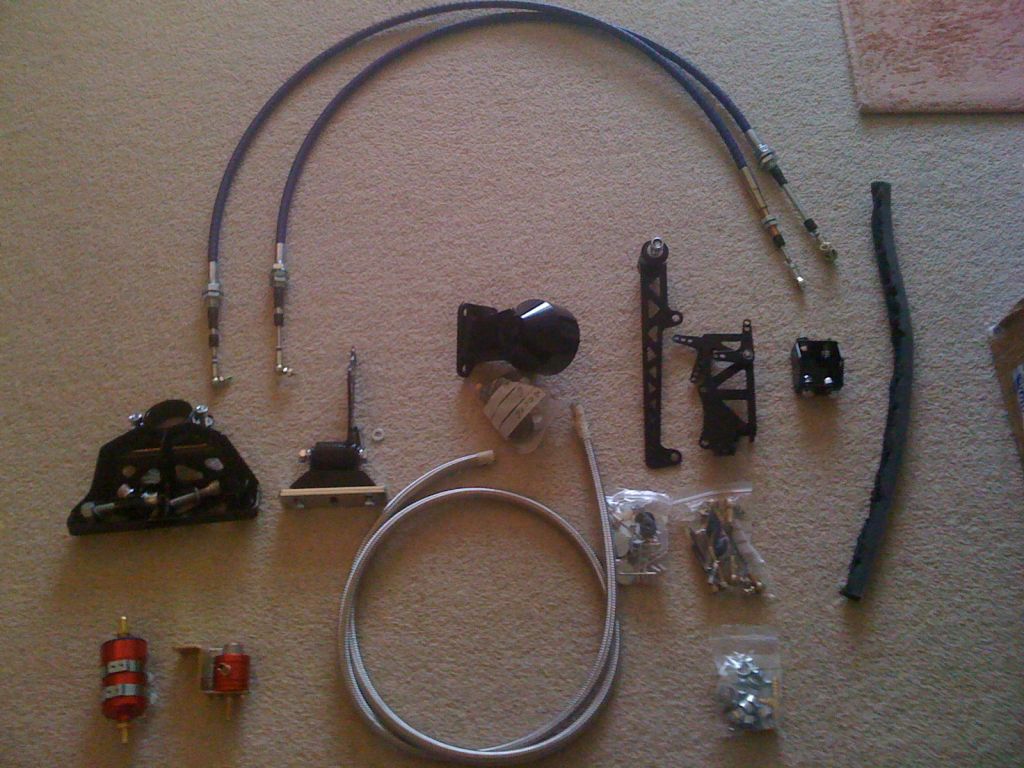
All the bits laid out...
Comments on the quality, service, cost will be covered later on in the project. On with the installation
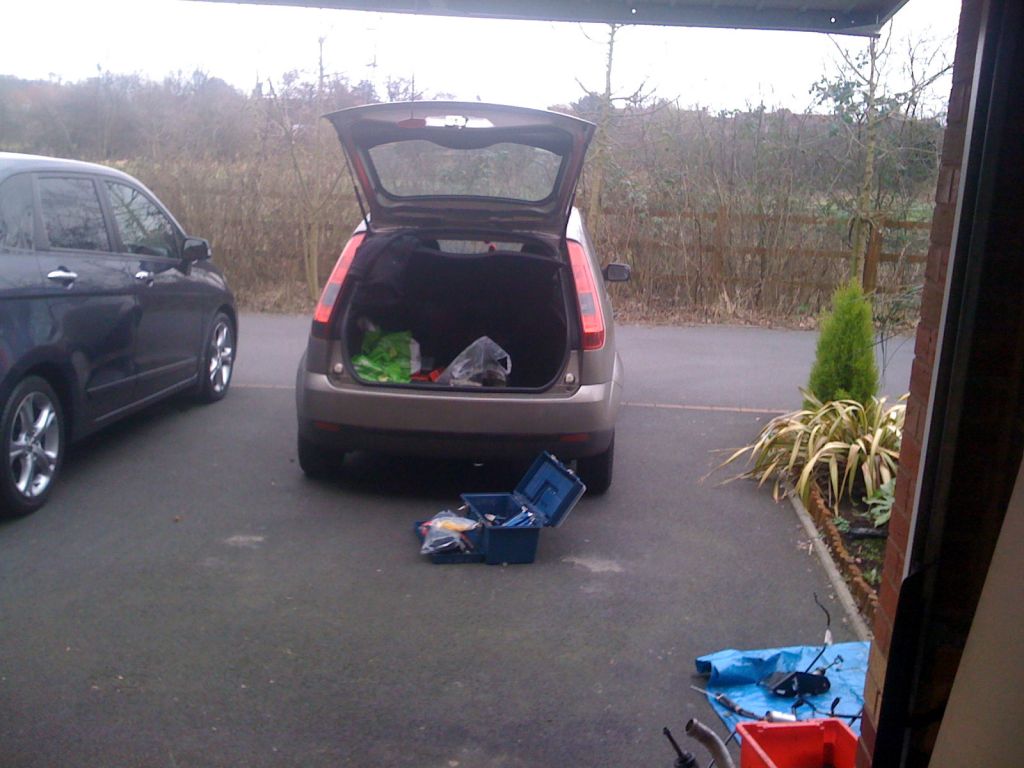
Martin R pulled up, got the overalls on and opened the boot - it was time to work!
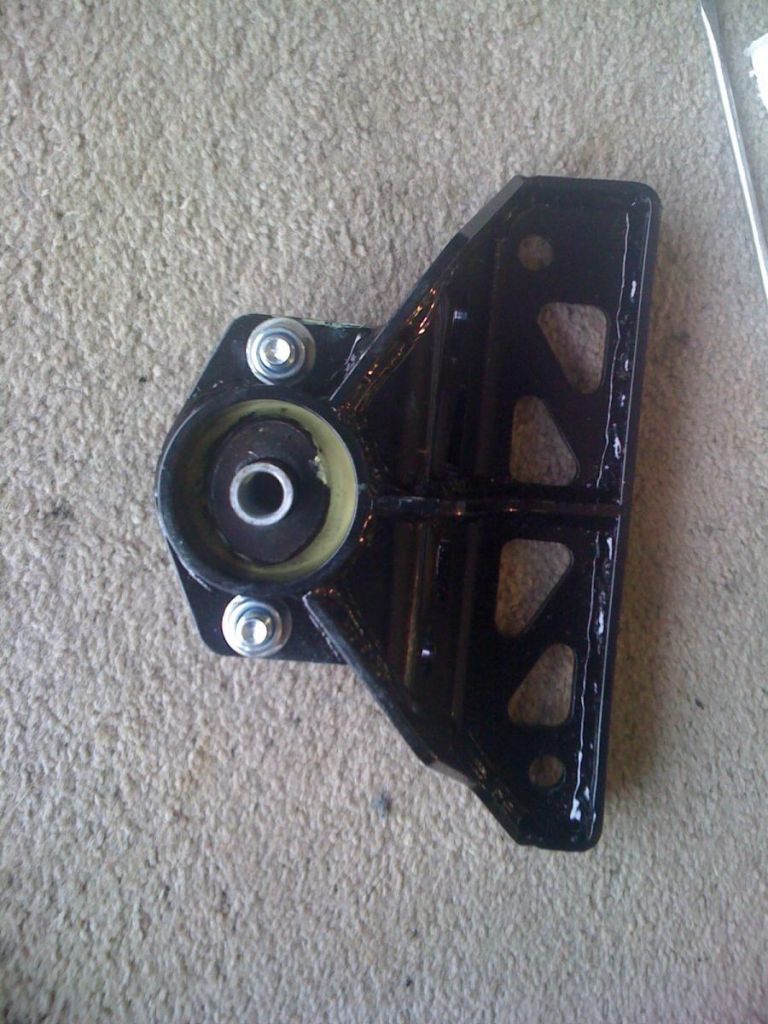
The first job was to prep the engine mounts.
The nearside mount simply uses the old Rover top hat mount, bolted directly to the new bracket.
Prep with Duralac to prevent corrosion...
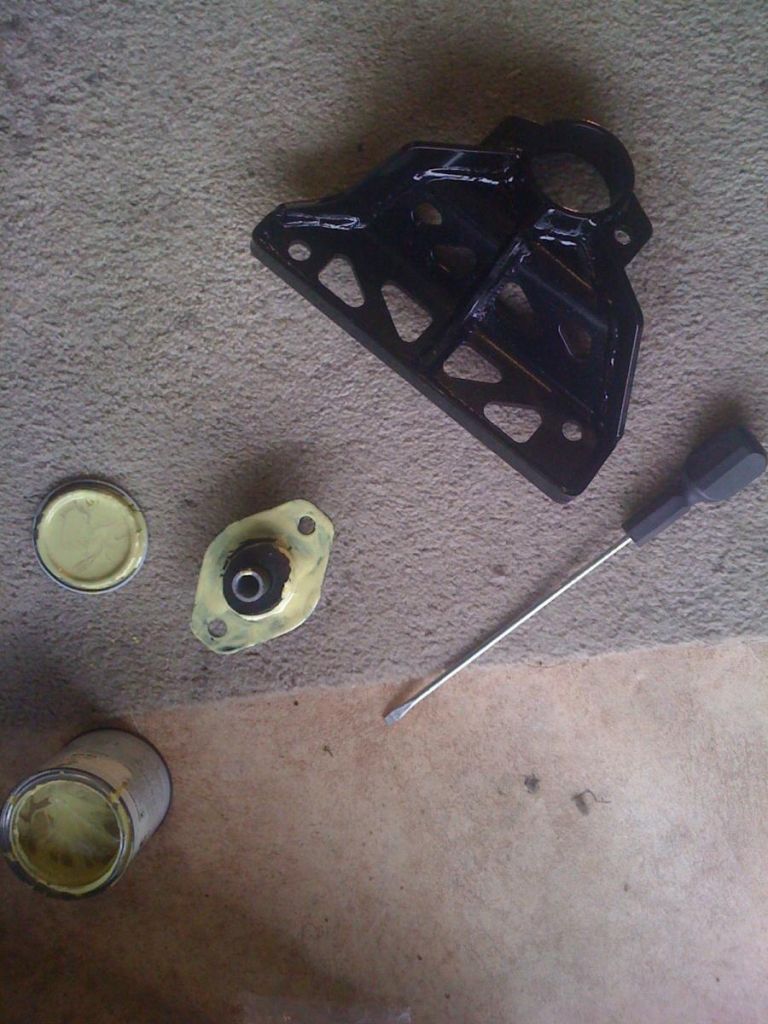
Bolts the bits together...
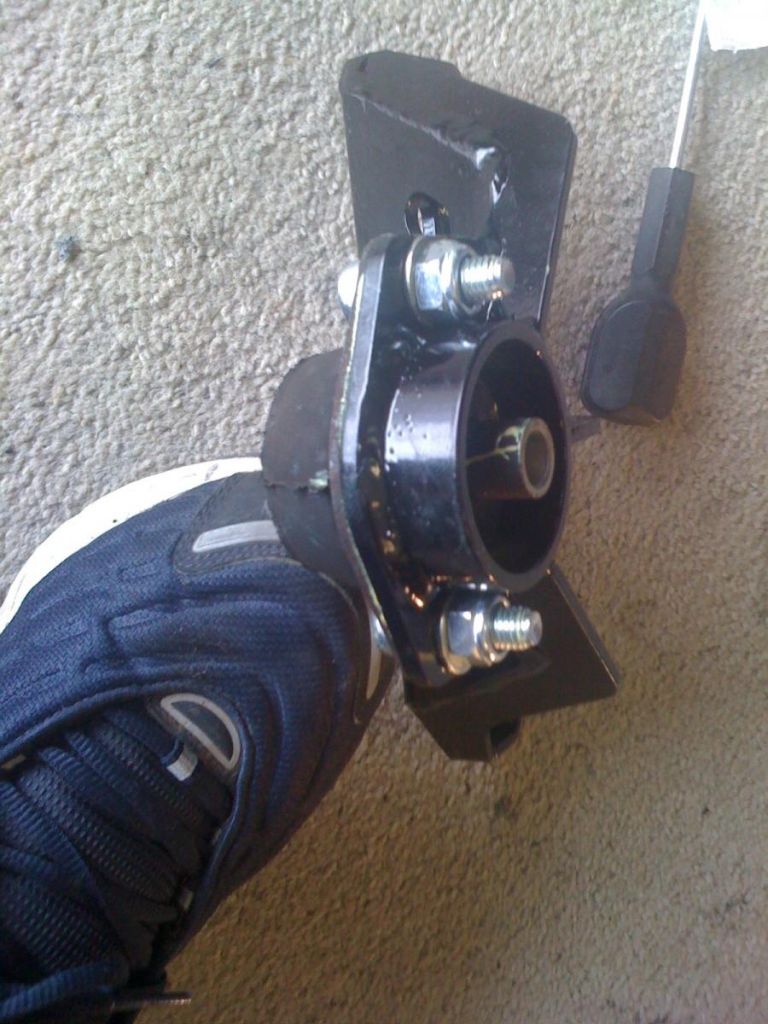
Job done!
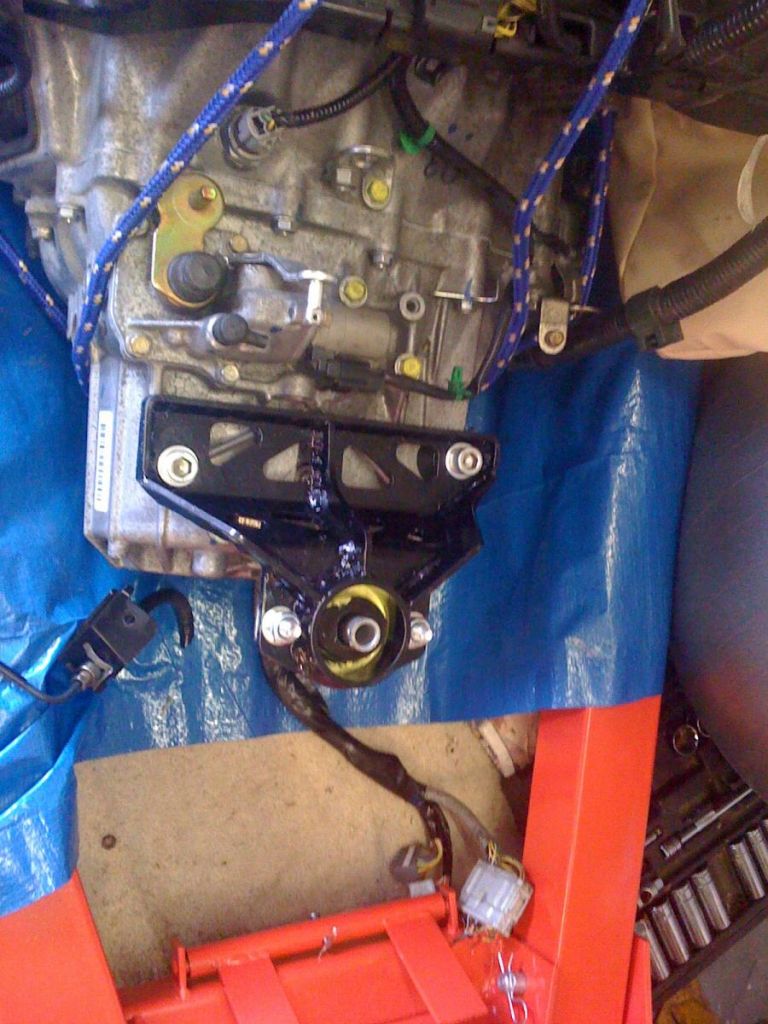
Next job was to simply bolt the new bracket onto the gearbox side of the engine. This was pretty painful and fiddly as the pre-drilled holes were not quite placed in the correct positions.
With an appropriate drill bit and 20 minutes later, everything lined up as they should and bolted to the end.
It should be noted at this point that the far side engine mount should be fitted once the engine is suspended in the engine bay. This makes it easier to manoeuvre the engine in.
Before installing, there were a couple of things to sort out.
1. Remove the lower engine mount left on the engine.
2. Install the new gearbox hydrophilic pipe on the engine.

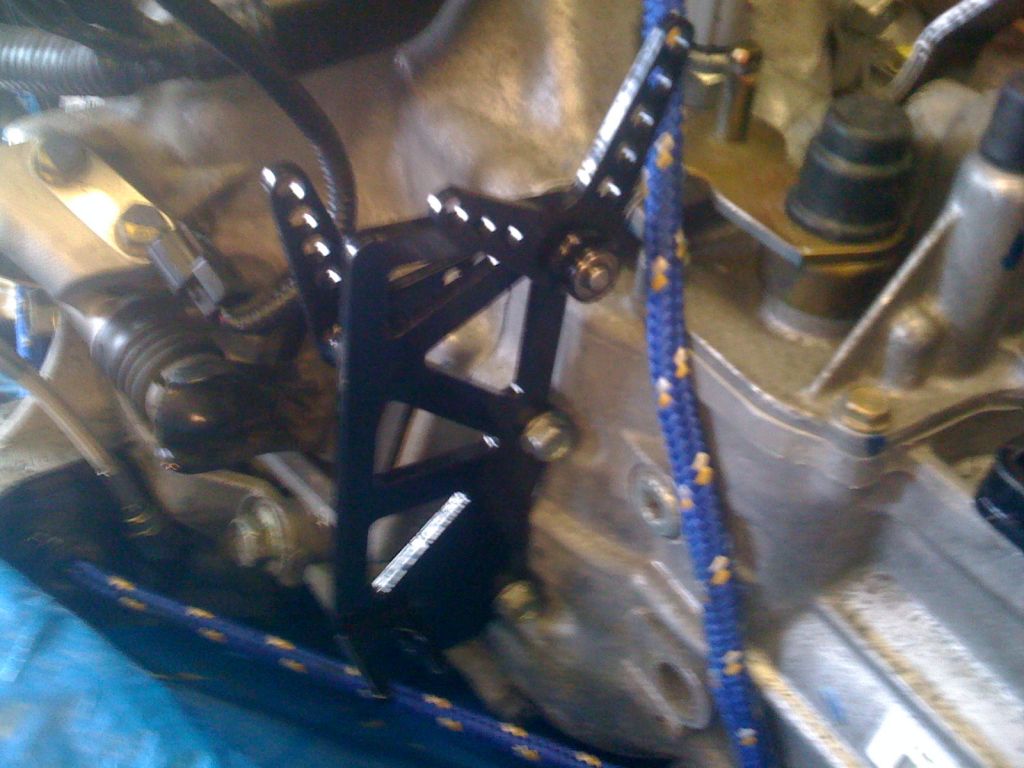
3. Install the gear linkage bracket.
Now we are good to go for the installation! ![]()
0 Comments
Recommended Comments
There are no comments to display.