Jump to content

litp.jpg

Lotus in the Peak
28th - 30th June 2024
  • Welcome to Midlands Lotus Owners Club (MLOC)

    Register now to gain access to all of our features. Once registered and logged in, you will be able to contribute to this site by submitting your own content or replying to existing content. You'll be able to customize your profile, receive reputation points as a reward for submitting content, while also communicating with other members via your own private inbox, plus much more!

    This message will be removed once you have signed in.

How To Install A 'shift-I' Shift Light To A K-Series S2 Or S1


Mark H

This should be the same for an S1 as it is for my early S2.


The method I used has been used by others. The current is so small and the wires never move that twist and tape seems to be acceptable. I would have soldered but I'm shit at it and probably would have ruined it rolleyes.gif


OK so here's how I did it:


Remove steering column cowl (2 Phillips and 2 torx screws)

P1170787.jpg


Unbolt stack from underneath (2 x 10mm bolts)


P1170788.jpg


Remove binnacle


P1170790.jpg


Unplug wire to back of Stack. The ones you need to splice into are A2 (black) ,A3 (green) and A4 (white/black). These are the earth, ignition and tacho respectively. The blue clip is numbered so you can actually see which wire is which. This way up a is the top row and wire A1 is on the right hand side.


P1170791.jpg


Strip insulation of said wires (I used a scalpel and still managed to cut through a strand of copper :tsk and wrap corresponding shift-i wire round it. It's quite fiddly as the wires are so close together and fairly tightly bound.


P1170796.jpg


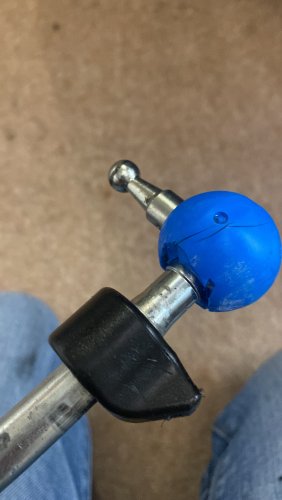
Cover joints in tape and bolt it all back together. Mounted the light at the very back of the binnacle pointing slighty upwards. I can see it over the top of the steering wheel.


P1170800.jpg


Seems to reflex nicely like a HUD on the windscreen too. (y)


P1170801.jpg


Seems to work on on the default sensitivity. One light comes on every 1000 rpm from 1-4000 so far. Didn't go any higher as I was sat in the garage and the engine was a bit cold. Can't for the life of me set up the lower and upper limits though. Didn't seem to work when I did what the manual says. Will have another go tomorrow.


I reckon from start to finish it was about 50 mins. Not bad as I'd never removed the binnacle before and the wires were a bit of a PITA to do as they are so small.


User Feedback

Recommended Comments

There are no comments to display.


Join the conversation

You can post now and register later. If you have an account, sign in now to post with your account.

Guest
Add a comment...

×   Pasted as rich text.   Paste as plain text instead

  Only 75 emoji are allowed.

×   Your link has been automatically embedded.   Display as a link instead

×   Your previous content has been restored.   Clear editor

×   You cannot paste images directly. Upload or insert images from URL.


  • Elise Cup Front Splitter

    Hello everyone,  It has been a while since I've made a post. It's finally that time of year that the car is coming out more frequently and for some reason I seem to have back luck with my front splitter. I was wondering if fellow or ex Elise Cup owners could shed some light onto how you manage to keep the splitter in good nick? It's a little deflating when it bottoms out or hits something and you step out the car and see the damage.  Any suggestions welcome 🙂,  Iowan

    IowanF1999
    IowanF1999
    Technical Talk

    S1 Type 49 Elise Refresh

    And so the winter refresh of my S1 Elise started today. Hoping to take front clam of tomorrow. However of the 4 lower bolts that hold the lower rear to the chassis, 2 are spinning and 2 won't budge despite copious amounts of penetrative oil over the last few months. The Eagle eyed will spot my Dremel tool which I'm not looking forward to using to remove 4 bolt heads that have limited access. Currently on my list are replacing the driving lights brackets, shot blast and paint the tow post, n

    Badger02
    Badger02
    Technical Talk 226

    Bilstein Repair Service

    Hi A couple of weeks ago my 2008 Elise failed its MOT due to leaking rear Bilstein dampers. A look on elise parts and they were £330 incl Vat each without the springs, so I decided to look at my options and found out that Bilstein offer a rebuild service. Dropped them of at their service centre in Leicester last Monday, picked them up yesterday. £140 incl vat per damper for new seals, pistons, gas and oil plus a degrease so less than half the cost of new ones. Very good

    Badger02
    Badger02
    Technical Talk 15

    Lotus in the Peak - Teaser videos

    Hi all you lovely MLOC people.  We're hopefully going to create a series of teaser videos for Lotus in the Peak 2024 and post them onto social media.  Maybe you have suitable footage that could be used, or if you have ideas for getting more then please let us know.  They'll be posted onto the Lotus in the Peak Facebook page, so please like and share onto other Facebook groups. Here is the Link to our facebook page https://www.facebook.com/LotusinthePeak/ For more info and to get b

    PaulH
    PaulH
    General Talk 1

    Handbrake covers....whats yours look like?

    Ok, so my 2006 S2 has no handbrake cover. Looks like that's how most come out of the factory. Gear shift has the standard perforated leather. Im looking at the option of getting a HB cover, preferably to match the gear leaver cover, looking to keep it as OEM as possible.  What have other owners done with their handbrakes? Aftermarket to match? Or a set to swap out for a new look? Nearly all I have seen go over the top and outside. Any neat ones that tuck inside the HB slot? Show u

    Dave-hp
    Dave-hp
    General Talk 5
  • MLOC classifieds

  • MLOC garage

  • Member Statistics

    4,222
    Total Members
    1,800
    Most Online
    Colgy
    Newest Member
    Colgy
    Joined
×
×
  • Create New...

Important Information

We have placed cookies on your device to help make this website better. You can adjust your cookie settings, otherwise we'll assume you're okay to continue. Terms of Use