richbk Posted April 22, 2022 Author Share Posted April 22, 2022 Cracked this too, a day of progress , I hadn’t taken picks , but had marked the edges where the tiny brackets fitted. Mine now look like the above , slightly off set from what I imagined was right but having ready the SELOC thread this seems correct so all is good . Nice close fit into the clam with the new foam seals , but will no doubt need adjusting to correct levels before wheel arch liners fitted . clam back on got a test fit , and with a few washers and shims I have to say it fits better than my exige clam (job for next winter maybe !!) . Link to comment Share on other sites More sharing options...
Lithopsian Posted April 24, 2022 Share Posted April 24, 2022 Drivers side doesn't look right. Did you mount it "the same" as the passenger side? It is confusing because the three mounting points are symmetrical/reversed as you might expect (or might not!), but then the mounting of the lamp itself is completely different to produce the same dipped beam cutoff and kick up from both lamps. Here is the full-size version of my avatar photo which conveniently shows the headlamp. I can show the other side if you need it, but I think you have that one right. Link to comment Share on other sites More sharing options...
richbk Posted April 25, 2022 Author Share Posted April 25, 2022 Thanks for the input folks , lights look pretty similar to the image I took when removing so hoping they are just in need of some fine tuning 🤞🏼🤞🏼🤞🏼 Link to comment Share on other sites More sharing options...
richbk Posted April 25, 2022 Author Share Posted April 25, 2022 Electrical gremlins tonight , had battery on trickle charge but not fully up to charge yet and when we pop the key in the ignition a high pitched peeeeeep is emitted and nothing else . Can’t seem to disarm immobiliser , no starting process . Got all the lights light up on the dash though . When I press the headlight button the stack of 4 button lights light up briefly and finally the beeeeep stops . haven’t done much electrical other than had battery off and out , had all front lights unattached and had heater matrix out. All those are on plastic click fittings so no soldering , wiring etc been done . any thoughts ? Link to comment Share on other sites More sharing options...
Lithopsian Posted April 25, 2022 Share Posted April 25, 2022 Sounds like a normal flat battery. Which alarm do you have? Fob lost synchronisation? Cobra alarms don't behave well when the battery is flat. Headlights should come on regardless, although maybe dim if the battery is half flat. Headlamp and side light switches should light up with ignition on, not very bright (much brighter if the button is pressed). The other two should light up when the sidelights are on, either using the switch or because the headlamps are on. Link to comment Share on other sites More sharing options...
richbk Posted April 27, 2022 Author Share Posted April 27, 2022 Hi. It has the cobra alarm similar to my S2 . When that fails I don’t usually get the beeeeep , just nothing . battery on trickle , will try again tomorrow when I have wrapped the exhaust and finally got it back down on its wheels of the axle stands . progress , fingers crossed it can be on the road for May , with other jobs done whilst it’s in use and enjoying the sunshine ….. Link to comment Share on other sites More sharing options...
DeanB Posted April 27, 2022 Share Posted April 27, 2022 Rich what did you paint/coat the wishbones with in the end? I had a good look at mine the other week and the black POR15 was actually still intact, and no new rust had penetrated (that i could see), they just had some brown dirt on which I cleaned off and then I treated them to a protective spray - it's made by Muc-Off I think, for motorbikes. It should offer decent protection until next spring. Link to comment Share on other sites More sharing options...
DeanB Posted April 27, 2022 Share Posted April 27, 2022 Btw looking forward to seeing you and your lad out in convoy at Hassop one Sunday morning 😊 Link to comment Share on other sites More sharing options...
richbk Posted April 27, 2022 Author Share Posted April 27, 2022 Hi Dean . Had the wishbones blasted , etch primed , primed and 2 coats of some type of rust resistant coating then we did POR15 when back with us . All in Black To finish it off . Will definitely make a run one Sunday this year . Hoping to be back on the road in May . ethan has wrapped the exhaust today and also weirdly wrapped the heater pipe . I now this is a thing that can be improved with some insulation and can’t see why this wouldn’t work , but just seems a bit wrong !!! Link to comment Share on other sites More sharing options...
DeanB Posted April 27, 2022 Share Posted April 27, 2022 Heater pipe looks good to me Link to comment Share on other sites More sharing options...
Lithopsian Posted April 28, 2022 Share Posted April 28, 2022 That's different. Must have been a pig to refit, hard enough just with the plain flexi foil. Link to comment Share on other sites More sharing options...
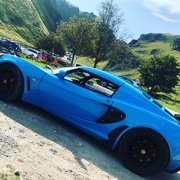
richbk Posted May 4, 2022 Author Share Posted May 4, 2022 More progress , alas in the excitement of getting things done I didn’t take many pictures . The car is back in one piece and road worthy . clam back on , bonnet re positioned 27 times , it had been snagging previously and taken paint on the front lip so wanted to make sure it would fit correctly for when we do finally get it fully repainted ( won’t be this summer alas as funds won’t allow ) Brakes , wheels , fluids all back in . Had to run with cap off expansion tank for 20 mins to purge final bits of air but a solid 82 is now present , but not Road tested yet . Brake bleed is proving testing , so might get my garage man to have another go when it goes in for check over and final jobs next week . have the paintwork a bit of TLC with compound, claybar , polish and wax . I know you can’t polish a turd long term, but you can roll it in glitter for a while 😉. tackling final jobs at home now , window position as I have leaks and 1 if not 2 broken clips in passenger side , re fit interior sill pads , trim etc . then it is off to local garage who preps some motorsport and has been super helpful so far for geo, alignment, suspension check over , gear linkages fitting ( was blocked by axle stand position ) and will be super easy on a ramp , metal throttle body and 135 cams . Really looking forward to driving this tiny little beast , but not as much as Ethan , who despite not getting around to posting on here has spent hours and hours working on the car . Proud of his efforts so far .. ohh and in the mean time we bought this off a friend who was told by their local garage it had failed power steering and would cost £1000 plus to fix . £250 later for a life time warranty repair and a full valet, detail, clean, wiper replacement and mini service has just flown through its MOT with no advisories . So if anyone wants a cheap to run, insure , tax, car for daily commute or new driver , drop me a message Link to comment Share on other sites More sharing options...
Lithopsian Posted May 4, 2022 Share Posted May 4, 2022 Looks good, but headlamp definitely wonky The wheels look immaculate. Have they been refurbished at some time during their 20-odd years? Link to comment Share on other sites More sharing options...
MrWill Posted May 4, 2022 Share Posted May 4, 2022 Well done Ethan and Dad. Brilliant job you two. 👏 My favorite colour for the S1 and it came up really well. The 135 cams are a great choice. Look forward to see it in the flesh at LitP Link to comment Share on other sites More sharing options...
DeanB Posted May 4, 2022 Share Posted May 4, 2022 That looks great, really nice. Well done you two. Link to comment Share on other sites More sharing options...


Recommended Posts
Archived
This topic is now archived and is closed to further replies.