Jump to content

litp.jpg

Lotus in the Peak
28th - 30th June 2024
  • entries
    72
  • comments
    68
  • views
    673,013

About this blog

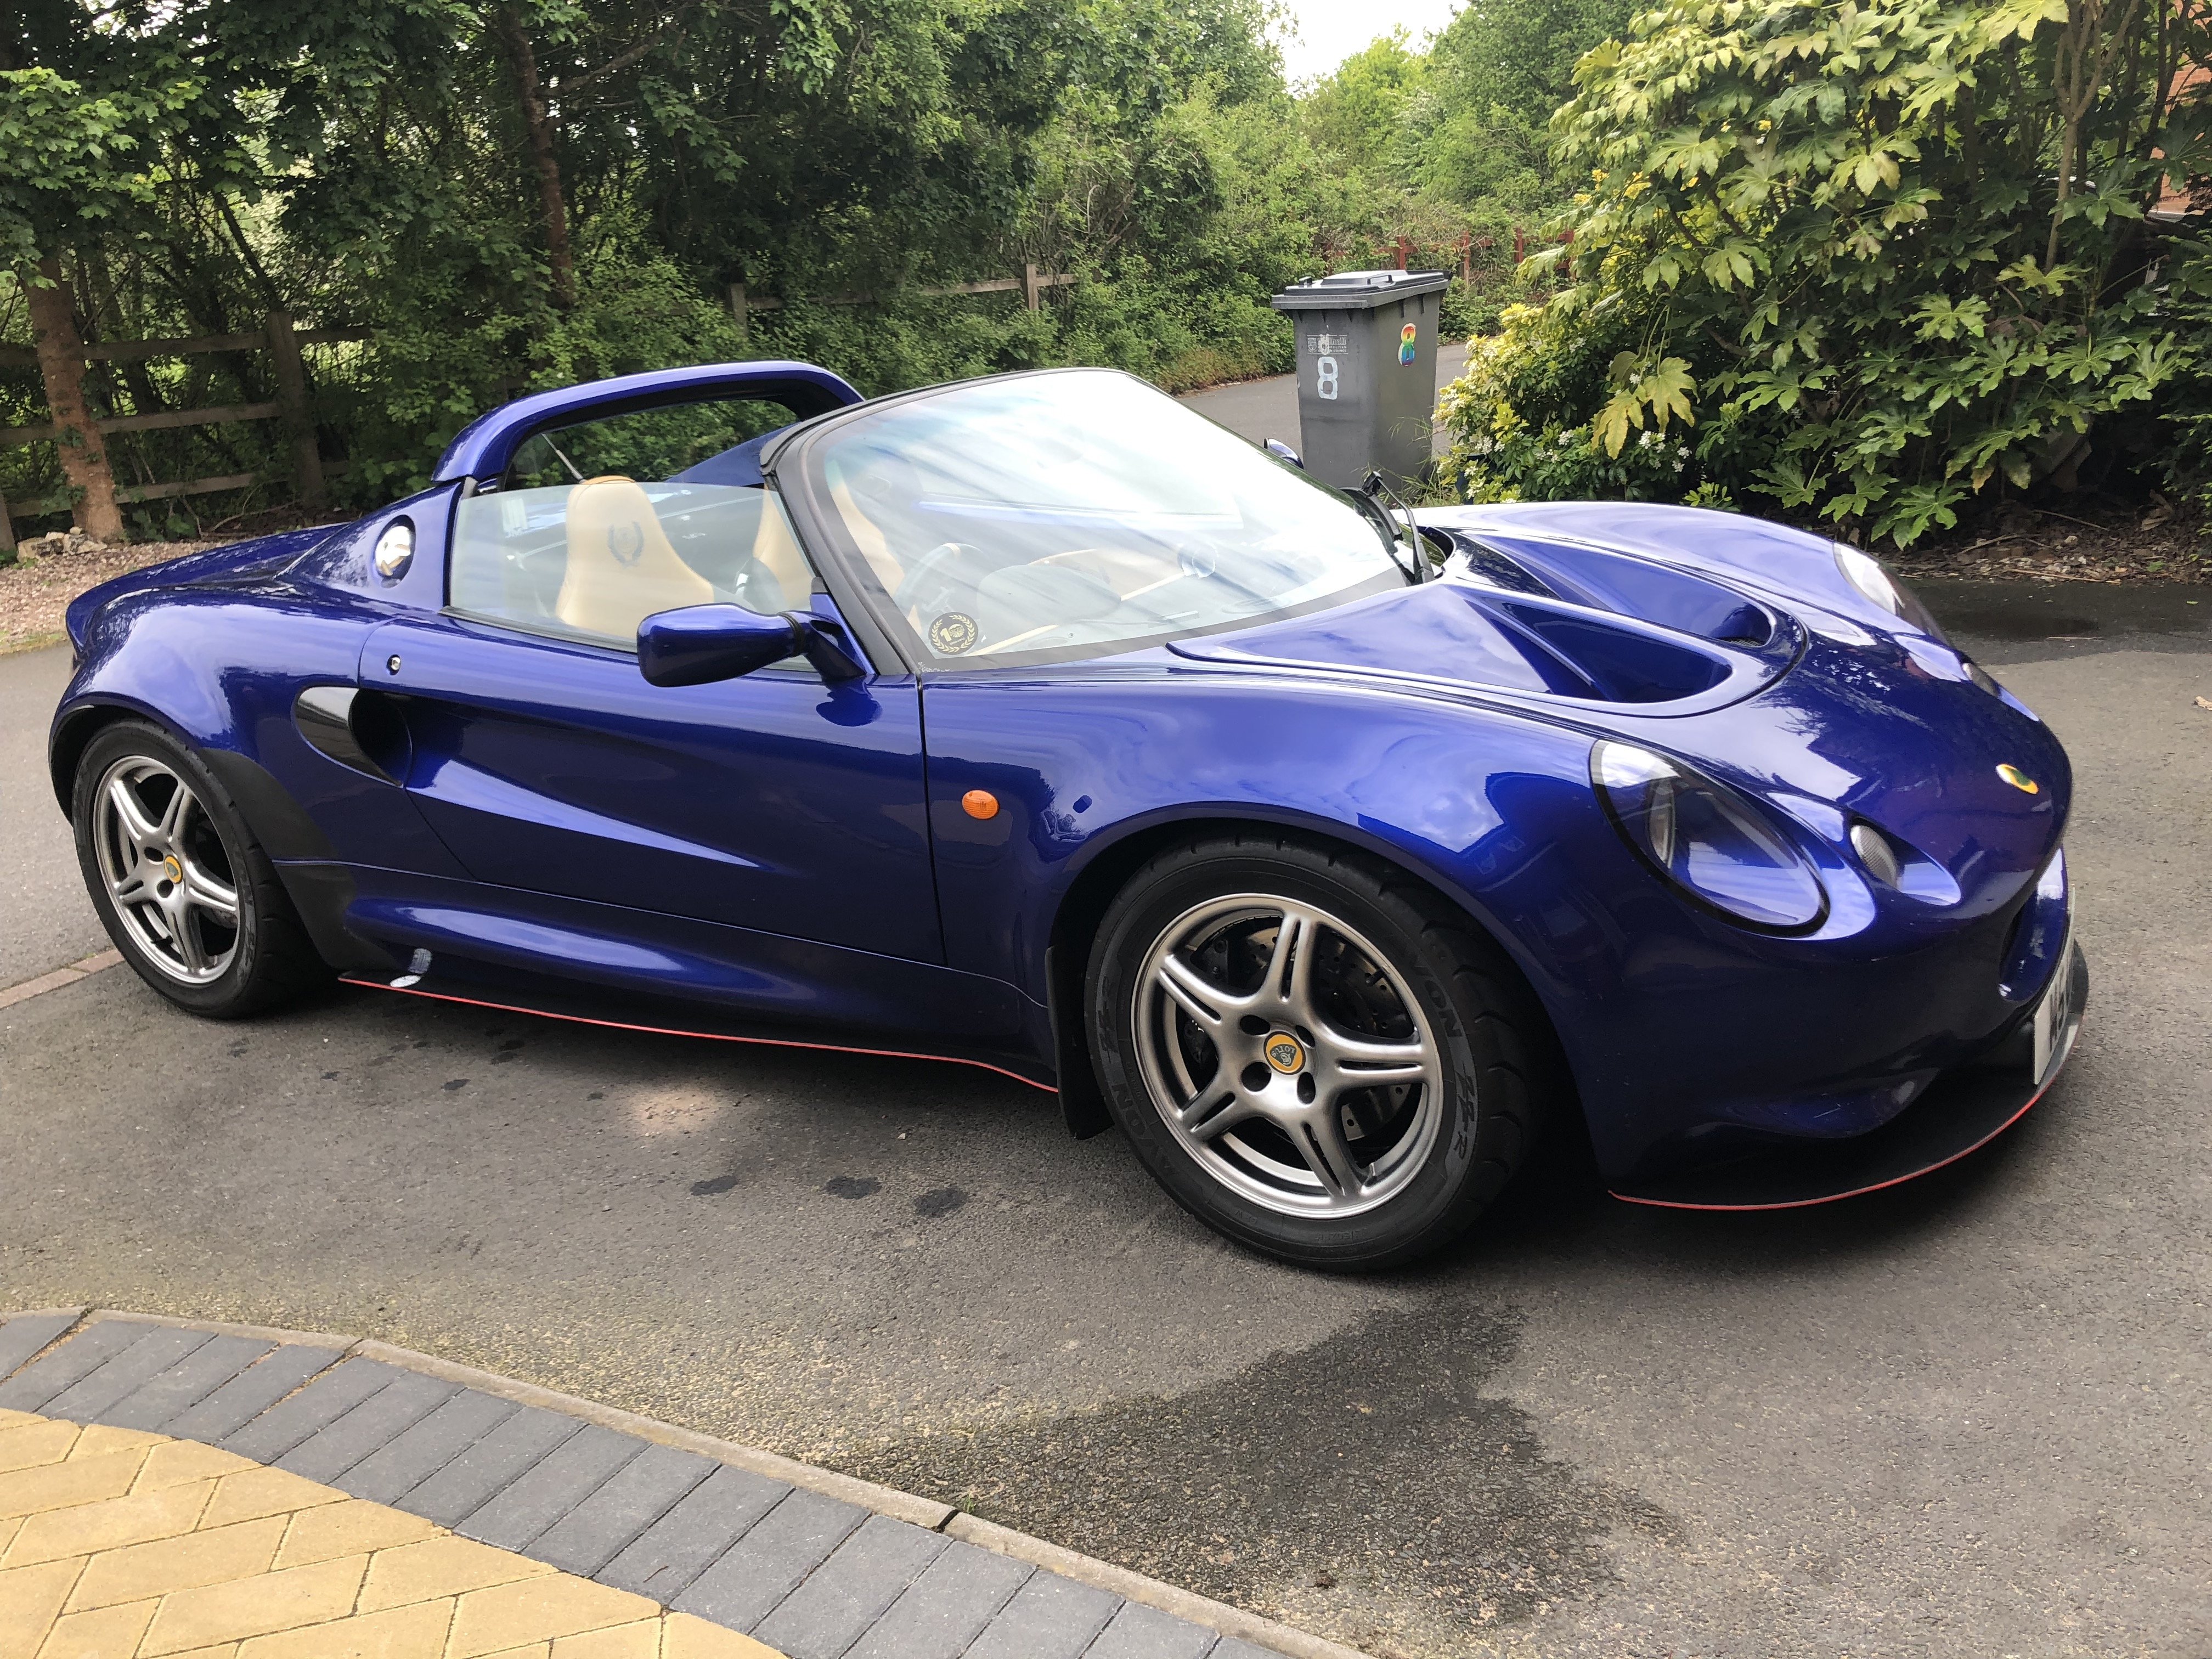
Lotus Elise S1 Honda Conversion

Entries in this blog

Fuel Installation 2 - Swirl Pot

I chose to start the work on the fuel system before tackling the supercharger.   Kit:   1. Fuel hoses 2. Fuel pump ( Bosch 044) 3. Wiring/ cables 4. Relay 5. Swirl Pot 6. 3.5 Fuel Pressure Regulator 7. Fittings   Swirl Pot   I decided in going for a two litre swirl pot, but I have read somewhere that you can get away with anything down to 0.5 of a litre.     I chose to locate mine on the firewall, lower left hand side of the engine bay, where the charcol canister used to be.

mambosasa

mambosasa

Trickle Charger External Port

Like most folks who own these little cars, it sometimes ends up sitting in the garage for weeks on end, especially during the winter months. Traditionally, what I tended to do is lift up the front bonnet and connect a trickle charger every time I suspect that I am not going to be driving it for a while.   This method works well, however it is a right pain in the back side as you would then have to pop the bonnet again, remove the terminal before driving the car out. Over the years I have toyed

mambosasa

mambosasa

Lotus Elise Side Skirts

This is a mod that I have been thinking about for a while now. Doing my research over the years, it seems that there several options out there, made from various materials, ranging from carbon fibre to plywood. Now, having choices is a good thing, but one thing I struggled with was the cost. Hence me trying to come up with a solution of my own.   The Design   I was keen to design something that looked good, looked functional ( you can never test these things unless you have a proper wind tun

mambosasa

mambosasa

Intergrated Key And Alarm Fob

One of the most irritating thing about the standard key is the attached Cobra alarm scrotum. It's cumbersome and it does tend to break off. For years now, a few people have had a go at coming up with a workable alternative that would combine the key, with the alarm fob to have a more integrated key - pretty much inline with most car manufactures these days.   Unikey (I believe produced by Blackwatch racing) was the last real attempt at this, and reading the forums, it seems that they are curre

mambosasa

mambosasa

Window Weather Seals Replacement

Like all Elise S1, my window window seals are looking in pretty bad shape. They are pretty bubbly with internal rust and look well past their best.     So, what are the options available.   1. To replace with the original seals - like for like. This is a pretty good option, except from the fact that Lotus would charge you £75 or so for the the seals alone! (this may even be per side)   2. Replace them with aftermarket equivalent that has been used by others elsewhere - Woolies Trim v

mambosasa

mambosasa

Lotus Elise S1 Headlight Covers

I have been toying with the idea of adding the headlight covers to the headlights for some years now. To be honest, the S1 looks really good both with and without the headlight covers, so it has never been something that I felt strongly about.   Anyway, I finally decided to give it a go.   The Covers   I bought the headlight covers from a chap selling them on eBay. These were originally purchased from Eliseparts and the chap never got round to fitting them on his car.     First step

mambosasa

mambosasa

Charge Cooler Installation

Charge Cooling   As per my other blog entries, as it stands the car now runs about 317bhp on the Jackson Racing Super Charger and oil cooler.   I am still running Stark's standard 4:2:1 exhaust manifold as I am yet to convince myself that I can shell out the £1K plus for a 4:1 system (watch this space )   Anyway, as always I try to do something new/ different when it comes to the upgrades, only in name of 'why not'.   So once I decided that I want to go down the CC route, it was a matte

mambosasa

mambosasa

Suspension Refresh

Hey again,   Like most Elise', mine clonks and bangs with the best of them. Due to years of abuse, the suspension is feeling a little worn at the moment. As we have been having some of the worst weather in history, it is the perfect opportunity to get the suspension stripped and rebuilt.   Now, there are couple of very good blogs/ threads that go into detail as to what you need to do, so I am not going to do that here. I am just going to show you a quick over-view of what I got up to.  

mambosasa

mambosasa

Throttle Pedal Linkage

This is an upgrade that I have been considering for some time now. As most of you S1 owners will know, the original OEM throttle pedal plate and linkage are not the best. I get movements in all directions that has no impact on the actual throttle movement, basically, its bloody wobbly.   In the end, I decided to take the plunge and buy Eliseparts' version and see what I get.     The kit.   The kit itself is pretty basic, you get the control arm, bearings, washers and bolts. That is it rea

mambosasa

mambosasa

Cv Boot Replacement

Hi all.   Unfortunately, a couple of weeks ago, I notice that the nearside driveshaft CV joint boot had given up the ghost. The engine bay was covered by that horrible grease and I could actually see the opening on the boot.   I wanted to try something different from the original boot (that came with the kit), so I went for Hoffman's offering. It was quite expensive, however going by various testimonies, it was worth a try.   The work   I aimed to get the work done in about couple of h

mambosasa

mambosasa

Aluminium Indicator Stalks

Hey all.   What happens when I get bored? I buy something new for the car. Anyway, this time, after getting the inspiration from someone on SELOC, I decided to change my plastic indicator stalks.   Now, if I was to be honest, the original Vauxhall stalks are not too bad. They are functional and work pretty well. However, this is an Elise and if it could be changed, change it!!!   So, I rang up a few breakers yard for TVR Tuscan aluminium indicator stalks and after only a couple of call

mambosasa

mambosasa

Gearbox Oil Change

Since about 1000 miles, I have been hearing rather strange grinding noises from the gearbox, when I lift off. This seemed to get louder once the car really warms up. So, I decided to change the gearbox oil and go for something a little different.   Preparation   1. I removed the rear near-side wheel and left the car up on jacks.     2. I removed the diffuser and loosen up the centre undertray. This provided adequate access to the bolts required to drain the oil.     Draining  

mambosasa

mambosasa

Side Air Scoops

This is one mod that I have been wresting with for a while. Although I have dramatically changed/ updated my car, one thing that I have been trying to do is keep the standard look.   Unfortunately, with the addition of the SC, the engine bay temps have gone up somewhat and reading through various forum entries, it seems pretty inconclusive as to whether or not the addition of the side scoops actually makes any difference at all.     As the car is far from being standard anymore, I final

mambosasa

mambosasa

Jrsc Installation - The Installation Part 1

At this point, the car is pretty much prep'd and ready for the installation of the actual supercharger.   To re-cap, we have in place:-   1. All fuel lines 2. Swirl Pot 3. In-line fuel pump 4. Uprated pressure regulator 5. Secured the fuel filter in place 6. Changed the injector harness/ connectors   Left to do:-   1. Remove the original intake manifold 2. Make modifications to the bulkhead 3. Drop the charger in place 4. Drive belt 5. Go for a drive!!   The Charger   So, as

mambosasa

mambosasa

Uprated Gear Linkage Assembly

As you may have read on the conversion entries, as part of the Stark kit, they provide you with a gear linkage assembly that bolts to the back of the gearbox. You end up having to remove the Honda original assembly, along with the original selection weight.   I have seen the gear cables being routed in two ways.   1. Through the front of the bulkhead and up between the firewall and the engine   2. Through underside of the engine, then up to meet the gear assembly on top of the gearbox ho

mambosasa

mambosasa

Shift Beeper Installation

So, if you follow my blogs, you would have noticed that many years back, I installed a Head Up Display unit to project revs, shift lights, road speed onto the windscreen. This turned out to be a great mod that enable me to read where 'things' were during hard driving.   Downside   Now, I am not sure whether or not this happens to with other, more standard installations (ie shift lights right in front of you), however with time, my brain seemed to completely look through the HUD on the windsc

mambosasa

mambosasa

Dash Cam

The popularity of dash cams seems to have increased immensely over the last couple of years, no doubt driven by the Russian YouTube videos and awareness around 'cash for cash' cons.   The range of webcams our there is mind blowing. In my daily driver, I have a Blackvue, wireless version which is probably one of the best in the market and looking at some of the captured videos, it would be hard to disagree.   My Choice   Personally, I wanted to install something that was both small and low

mambosasa

mambosasa

Oil Cooler & Ali Radiator

Time for more installations.   As you may have noticed reading through the installation, I opted not to install an oil cooler and upgrade the standard radiator as part of the original installation.   Apart from time, I really wanted to see whether or not the charger installation would work effectively without having the need to install these two elements - partly from a tech's point of view and cost. Thoughts on the installation   After running the car for some months now and covering ove

mambosasa

mambosasa

Wiring Loom

One element of this build that I did not look forward to was the electrics. Unfortunately there is no way round it and the car harness has to be modified to receive the Honda engine's loom.   At this point, I would like to give thanks to Alan Gourlay, who is currently doing the same conversion (posts on Seloc) who help me immensely in guiding me through the wiring loom modifications. To be even more precise, he provided me with his schematic drawings that I then used to create the 'new' loom

mambosasa

mambosasa

Oil Pressure Gauge

Some years back, I knocked up digital gauges that I managed to squeeze in dash and covered with sunglasses lens.   I was very keen not to have additional gauges mounted on the dash, spoiling the interior simplicity of the S1 dash. By getting the digital gauge 'hidden' in the dash, they are only visible once the car is on, however they are completely disguised when the car is off. The overall effect is pretty good.   On     Off     When I originally installed the gauges, I run the

mambosasa

mambosasa

Lucy lives on!

All, It has been some time since I last updated the blog.  All these years on, the little Lotus is still going strong.  She is now 20 years old and looks and drives as good as ever.  The love for this iconic car remains.   My days of mods and getting under the car every weekend are over I think.  I now simply enjoy the ownership experience and driving!  Oh, I also do a little bit of polishing - just a little. This car is simply pure magic and medicine to all gloominess. 😁

mambosasa

mambosasa

S1 Front Splitter Installation

Hey All,This weekend I decided to install a front splitter ( from Elisepower) and see what difference, if any it makes to the ride and handling. It took longer than anticipated, but pretty straight forward in complexity. Anyway, these are the steps taken.   1. I decided just jack up the car pretty high and placed a couple of safety supports. It was pretty tight ( being a lardy type of chap) but manageable.   2. Since the splitter itself sits directly under the front of the car, I decided

mambosasa

mambosasa

Electric Boot Release

I am back again.   It was this time last year when I kicked off the Project Elise Type R. A year on, I am still tinkering with it.   Next job, replacing my rusty boot release cable. Now, although you can buy the electric kits from various sources, due to the price, I opted to make my own.   Ingredients:   1. Christmas card ( for templating work) 2. Aluminium plate (for mounting) 3. Central locking actuator - 6Kg 4. Wiring 5. Relay   You should be able to get all the above for abo

mambosasa

mambosasa

Wishbone Removal

The next job on my list is to remove the rear far side lower wishbone that need to be sent out to Stark for modification.   Its worth mentioning that because this installation is likely to take me 3 months or so, I decided to officially take the car off the road with DVLA and the insurance company. Every penny counts!!   I reversed the car into the garage, placing it in such a way that I have good clearance all round, jacked up the one side and placed an axle stand on the chassis.    

mambosasa

mambosasa

Clam And Engine Removal Cont...

This weekend has been a big one. The aim was to get the rear clam and the engine removed all in a day! That is a lot of work to undertake in a single day, but given that the Saturday is the Feb 14th (Something to do with Roses and the like for the Wife), it was evident that I will not be able to spend the whole weekend in the garage.   At this point, I would like to extend my thanks to Phil S - of the famous T-Series conversion. A couple of weeks early, he had offered to come a long and lend h

mambosasa

mambosasa

×
×
  • Create New...

Important Information

We have placed cookies on your device to help make this website better. You can adjust your cookie settings, otherwise we'll assume you're okay to continue. Terms of Use