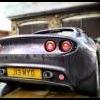
Jump to content

litp.jpg

Lotus in the Peak
28th - 30th June 2024

Heat Shield Needs Replacing


insanity

Recommended Posts

Hi All,


The heat shield on my 111R has started to fall apart, behind this (rear n/s):

CIMG6912-P20.jpg


This is what it looks like from behind the rear wheel:

CIMG6914-P20.jpg


It looks like you can buy the sections here: http://www.deroure.com/diagrams.asp?TBL=5782&MAK=1&MDL=11&SMA=0&SMO=0&ST=&SC=0


Items 5, 6 and 31 I think.


However, they cost around 50quid each! Ouch! Does anyone have them spare, following an exhaust upgrade or something they would like to sell on?!


Also, how easy is it to replace? I can't see how you can get to it, maybe remove the rear wheel?


Thanks,


Baz

Link to comment
Share on other sites

  • Replies 11
  • Created
  • Last Reply

I doubt anyone will have it spare as it's retained in an exhaust swap. It bolts onto the u bend on the cat. You can just use manifold/exhaust wrap instead which will be a bit cheaper.


I used wrap and then put new nimbus over the top.


Make sure you do something as that section of pipe gets very hot and it Is pretty close to the rear tyre and other components.


5/10 difficulty to replace. Remove wheel, remove wheel arch liner, remove undertray. Then be prepared for some swearing as I seem to remember the lamda sensor needs to come out (need open ended spanner or special socket with slot for cable. Then the two bolts that hold the heat shield top and bottom will have rusted. You will also need a pop rivit gun the join the two new halves together.

Link to comment
Share on other sites

Thanks Chris,


Any other places to purchase this stuff other than above?


Actually, can you recommend any exhaust wrap and places to get it?! That sounds like a cost effective solution!


Thanks again

Link to comment
Share on other sites

You could ring one of the advertising dealers and see f they will do you a deal on the nimbus heat Shield. It will only be available from deroue or a lotus dealer preformed In the intricate shape. There is no way you could make the shape yourself.


Exhaust wrap from loads of online places like demon tweeks. If you use wrap you won't need to take sensor out.


http://www.demon-tweeks.co.uk/motorsport/heat-shielding-protection


Wet/soak the wrap first and wear some gloves would be my advice.

Link to comment
Share on other sites

snap on my exige. i bought the best wrap i could and took my time ensuring all was well covered.

didn't replace the heat shield as it seemed to me that it would happen again.

that was 2 1/2 years ago and no issues since


richbk

Link to comment
Share on other sites

snap on my exige. i bought the best wrap i could and took my time ensuring all was well covered.

didn't replace the heat shield as it seemed to me that it would happen again.

that was 2 1/2 years ago and no issues since


richbk


Rich,


Did you remove the knackered heat shield prior to using the wrap or put the wrap over it?


I'm sorry if I'm asking a stupid question, I've never used wrap before, is it sticky flexible stuff or something?!


...and if you could remember what type of wrap it was, that would be a great help!


Thanks,


Baz

Link to comment
Share on other sites

I have just replaced the heatshield on my S1 Exige. Having considered all options, I went with replacing for a new standard part. You pays your money...

Link to comment
Share on other sites

Mine has also done the same - clearly a common issue. Fortunately mine was in position where I could extend the life a little bit as the main damage was the mounting holes on the lower section had pulled through, the forward hole on the upper section has also pulled through but the rearward mounting is still solid.


I would be interested if anyone manages to source new shields for a more reasonable price as when the time comes I'd prefer to fit parts in line with original specification.


In terms of fitting/replacing - to me it seemed getting the rear 'grill' panel out would make access significantly easier, but due to the lip at the top of the panel, and at the top of the heatshield rivetted to it, I couldn't get it out between the large exh silencer heatshield and rear clam - is there a trick to doing this?


CIMG7168_zps0bd860eb.jpg


CIMG7174_zps0cf7c7a4.jpg


CIMG7182_zpsbad53d94.jpg


CIMG7183_zps8b75245d.jpg

Link to comment
Share on other sites

hi

i removed / it removed itself when i fitted my tubular exhaust, corroded around the bolts as above and tatty round the edges.

exhaust wrap is like a mixture of 2" wide webbing fabric mixed with loft insulation and just as unpleasant to work with :)

wraps easily just ensure you cover all areas of the pipe , not a difficult job, otherwise i wouldn't of attempted :)


richbk

Link to comment
Share on other sites

  • 4 months later...

Well I finally got around to buying the heat shields and thought I’d have a go at removing the old one.


Managed to release the bottom tray with no trouble.


Also got one of the bolts out of the bottom section and although the bolt will require replacing (M6x10), I was quite happy and decided to spray the others with WD40 to free them up slightly.


Unfortunately, whilst trying to remove the second bolt from the bottom section the following night, the head snapped off!  L


I’ll post some pics later, but I’m a bit stumped to be honest, I could probably get away with attaching via just the 3 points.  However, I’m unsure whether I should even attempt to remove the top ones, ‘cos if it happens again, it’ll be a nightmare.


Any advice or help, if someone has better tools, would be great!


Thanks!


Link to comment
Share on other sites

It will rattle if you don't put all the bolts back in, so you need to try and get them all out.


Run a drill slightly smaller than the bolt through the broken off bit, if your lucky this will remove it, if not then go up a size and re tap it.

Link to comment
Share on other sites

Archived

This topic is now archived and is closed to further replies.


×
×
  • Create New...

Important Information

We have placed cookies on your device to help make this website better. You can adjust your cookie settings, otherwise we'll assume you're okay to continue. Terms of Use