


Entry posted by JonS
58,401 views
Lotus Elise S2
Front Clam Removal
JonS August 2010
Disclaimer: First and foremost, I have to say that this is not my recommendations on how to remove the front clam, this is simply the way I did it using a few other guides and a bit of suck-it-and-see. The guides I found available were for newer versions of the S2 Elise. My car is a 2001 51 plate S2 Elise. It seems that some of the components vary to newer cars (mostly 2004 onwards) so I have done this to explain how I got the front clam off, what tools were used and the order things were done.
Step 1 - Ramps:
4mm Allen key
8mm socket
First off I made up some ramps from some 5x2 inch wood. I did this for two reasons:
1. To help lift the car up to get the jack and a protective piece of wood under the car comfortably; and
2. To help keep the lifting angle down when lifting one side at a time, i.e. lifting the car in two increments helped get the axel stands underneath rather than doing each side in one larger lift.
Take off the top access panels, the radiator shrouds and the lower central plastic grill.

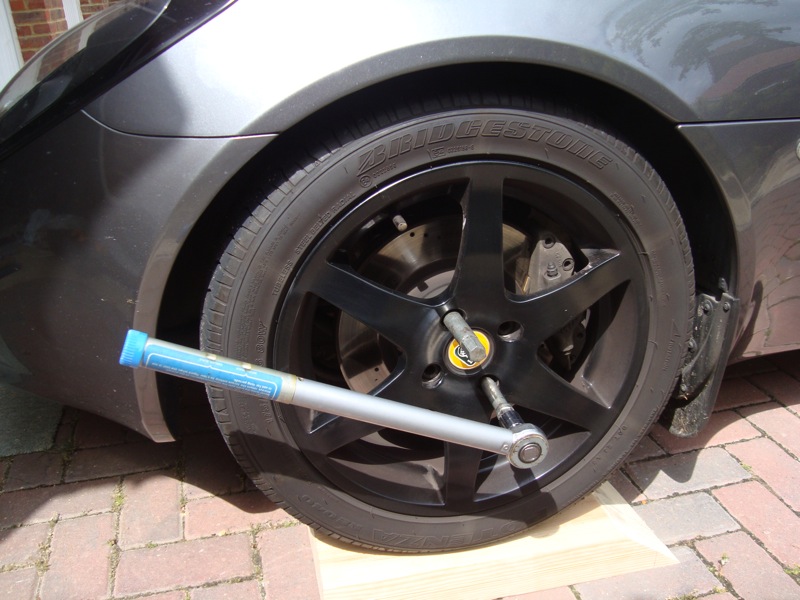
Step 2 - Wheel nuts:
17mm socket
Loosen wheel nuts slightly so they are easier to take off when the car is lifted.
Step 3 - Axel stands:
I cut some more wood to use as protectors for the chassis and so they would sit on top of the axel stand. Lifting the car high enough to get the stands underneath was very nerve-racking.
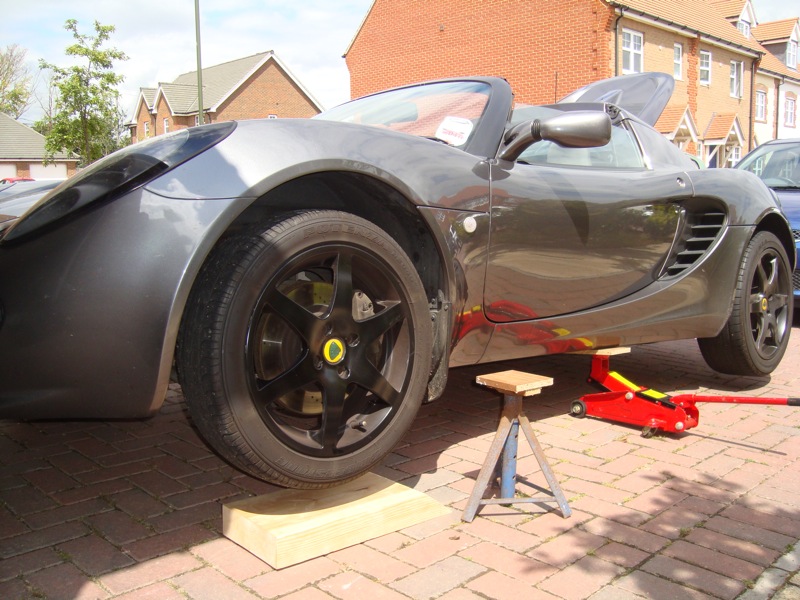
Once I had the one stand under and lowered the jack, the car was then left balancing on the rear wheels and one stand so I had to do the other side fairly swiftly. Lifting in the two increments helped. Use the wooden ramps then as rear wheel chocks.
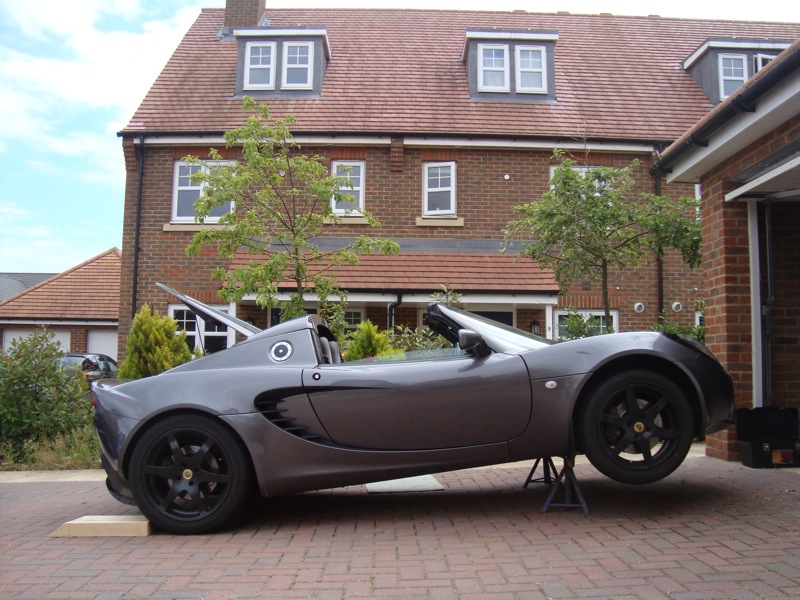
Step 4 - Wheels off:
Take out the loosened wheel nuts, remove the wheels and place under the car for safety.
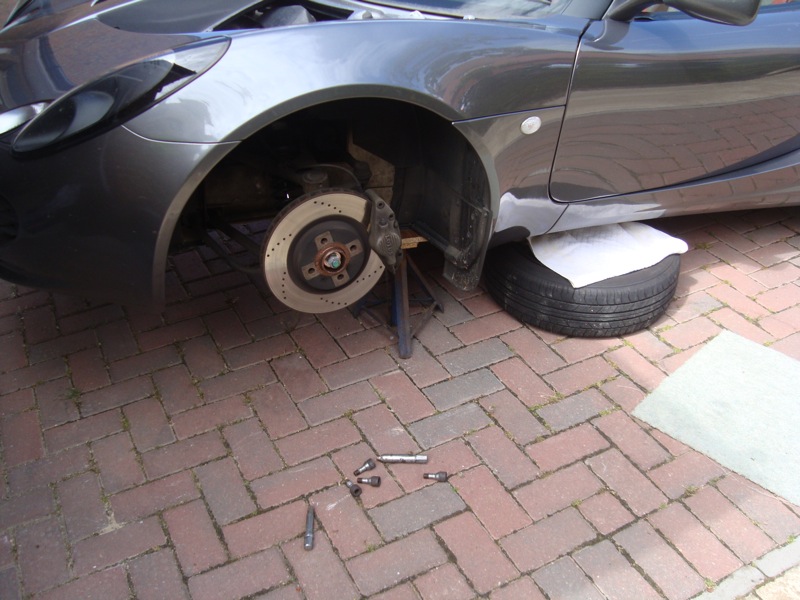
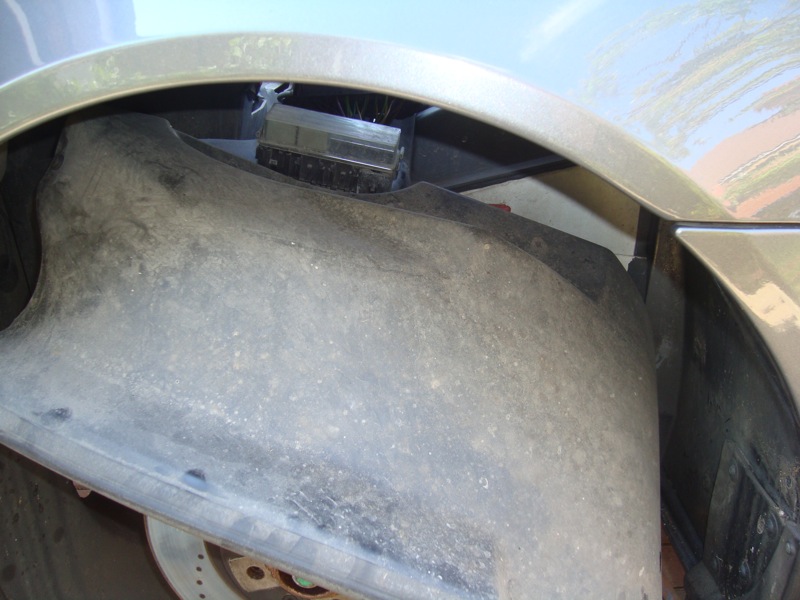
Step 5 - Wheel arch liners:
8mm socket
Philips screwdriver
Both wheel arch liners need to come out, the smaller front one and the larger rear one. There are a number of nuts, screws and plastic screws that hold these in place, see image below, they are all easy to get at with the wheel off.

A number of the plastic screws on both sides had been rounded off over the years so I had already bought a couple of packs to replace them when they were to go back on.
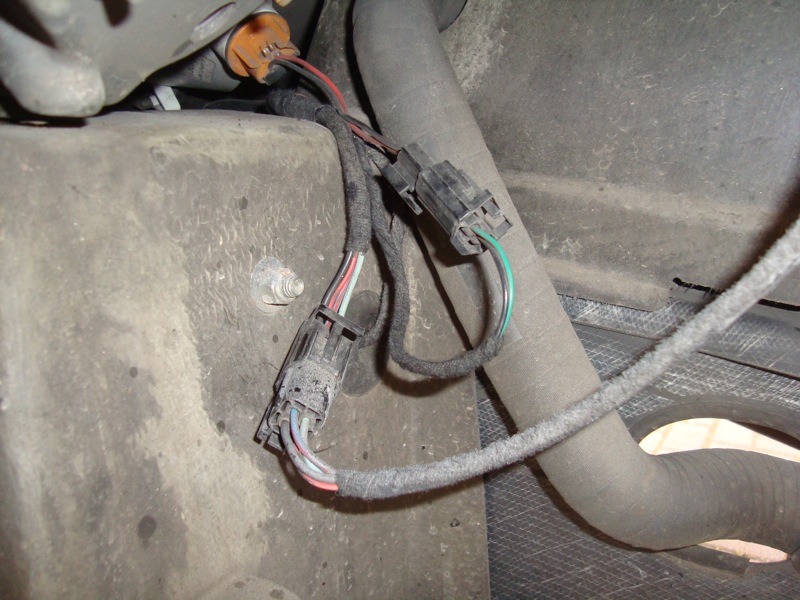
Step 6 - Fuse boxes:
8mm socket
Philips screwdriver
On my car the fuse boxes are mounted on top of the near side wheel arch liner. These need to be removed from the liner but not taken off the car altogether.
Once the wheel arch liners are loosened, pull them down over the brake disc so you get access to above and below the fuseboxes. They are fixed with different sized rawl nuts. As they are in the wheelarch they have just got covered in all kinds of the day-to-day dirty so they were well and truly seized up. In the end I just forced them through the holes from the top and will replace the rawl plugs and fixings with new ones afterwards.
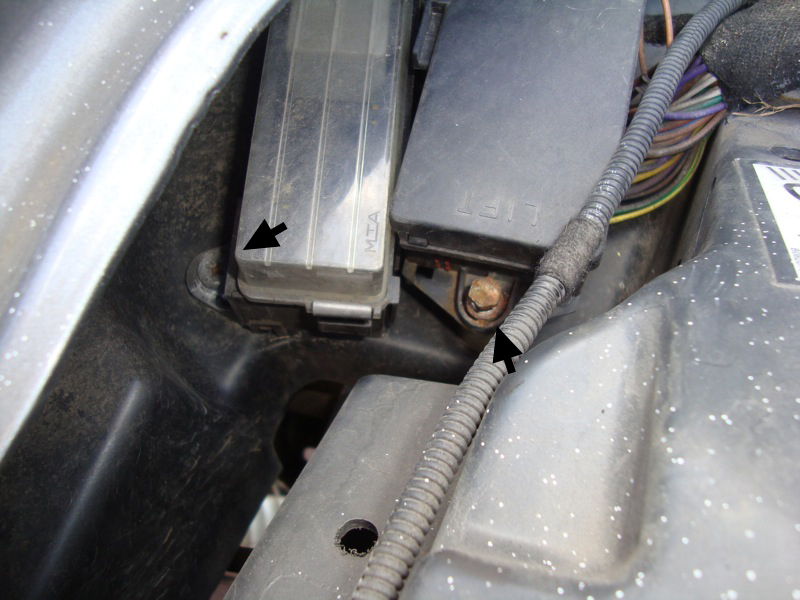
Once the fuse boxes are unscrewed the wheel arch liners should come out easily.
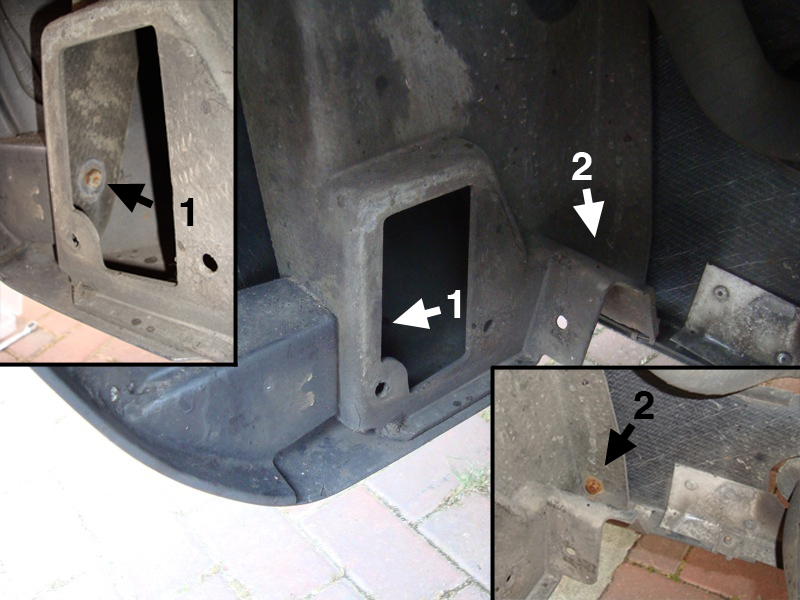
Step 7 - Door hinge cover panels
10mm socket
10mm spanner
Philips screwdriver
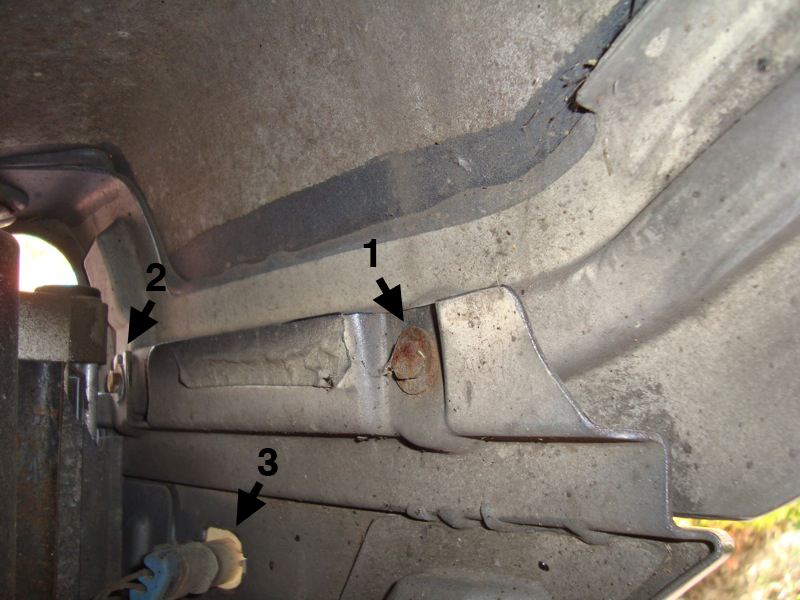
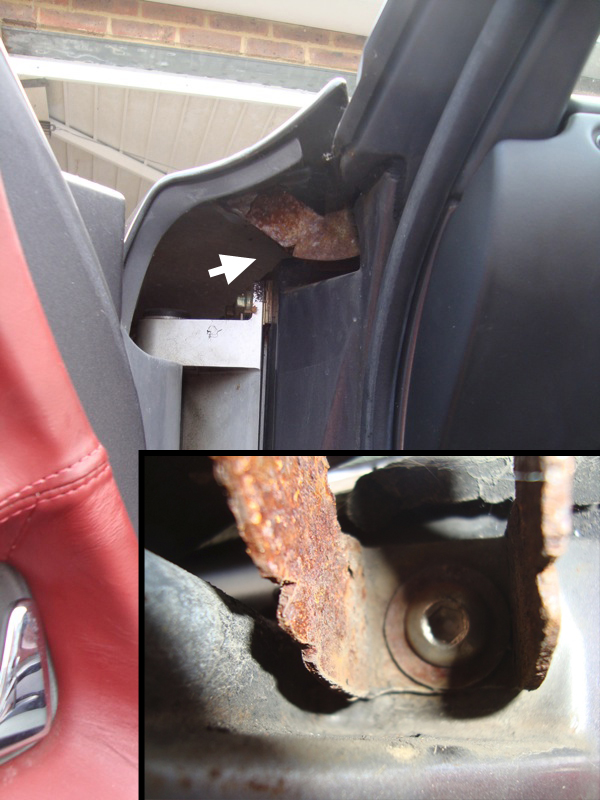
Next up are the door hinge cover panels, also known as the side indicator panels. Apparently you don't need to remove these panels to take the clam off, but it certainly was one thing less to worry about when lifting the clam off at the end.
These are a little tricky to remove as they are held in underneath within the chassis and on top by the clam itself (see images below).
First you need to remove the forward of the two bolts on the inside of the wheel arch (Labeled #1 below), connecting the panel to the clam. You only need to loosen the rear bolt, DO NOT REMOVE the rear bolt (#2) as it will be extremely difficult to get back in. Careful of the thin aluminum washers, they will fall out once the bolts are loosened.
Unclip the electrical connection to the indicator (#3) and tie it up inside so it doesn't catch anything on removal.
Next, remove the black plastic cover inside the door opening held in by two plastic screws. This reveals another 10mm bolt. Remove the bolt.
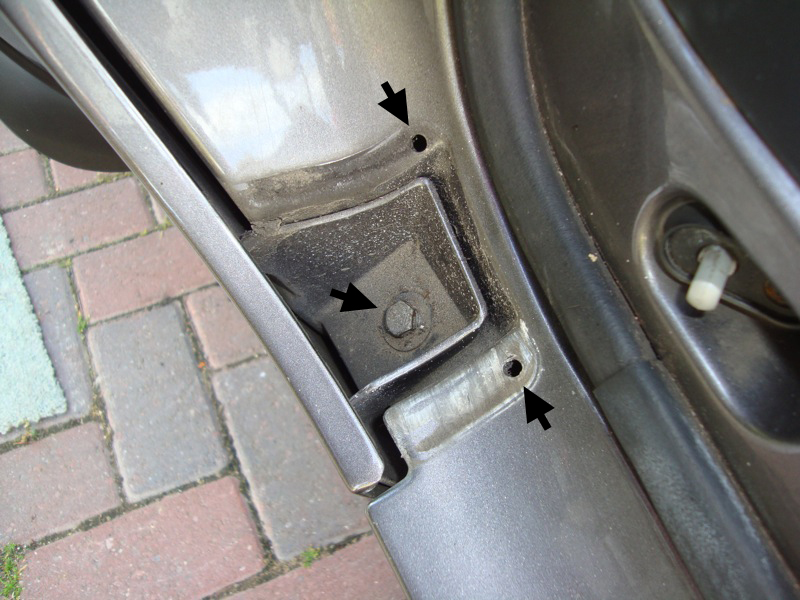
Next undo the four plastic screws holding the mud guard on (#1). The guard will not come off as it is fixed to the indicator panel. Finally, remove the two bolts underneath the car (#2).
You will then be able pull the bottom of the panel free of the chassis and slide the top part downwards.
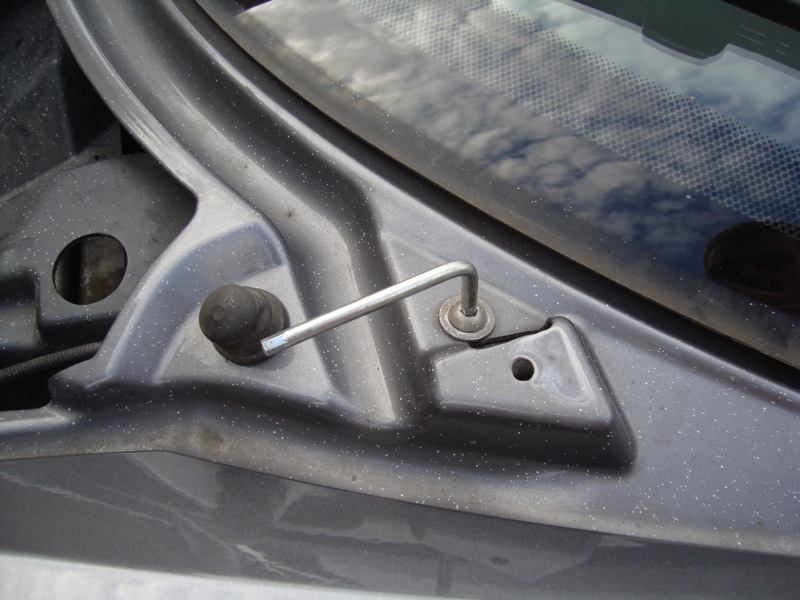
Step 8 - Fixing to base of windscreen A-pillar
6mm Allen key
This Allen bolt is quite tricky to get at and you don't get much turning space. I have a mini ratchet that fits Allen keys so I was able to use this rather than a standard Allen key.
Step 9 - Fixing to lower frame of windscreen
6mm Allen key
Another Allen key bolt that is far easier to access, this is at the base of the screen on top of the clam. There is a rubber/foam washer underneath that will probably be stuck either to the clam or the car, be careful not to loose these at they pack the clam up and help the alignment.
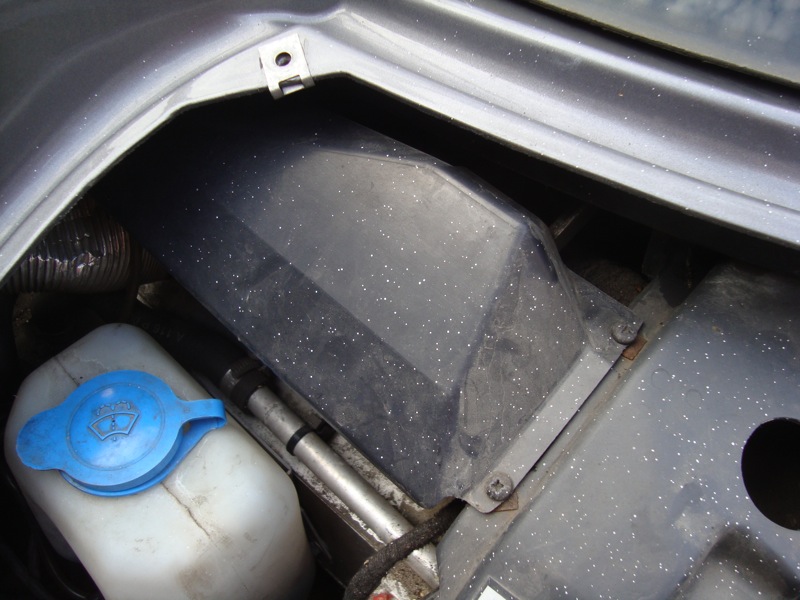
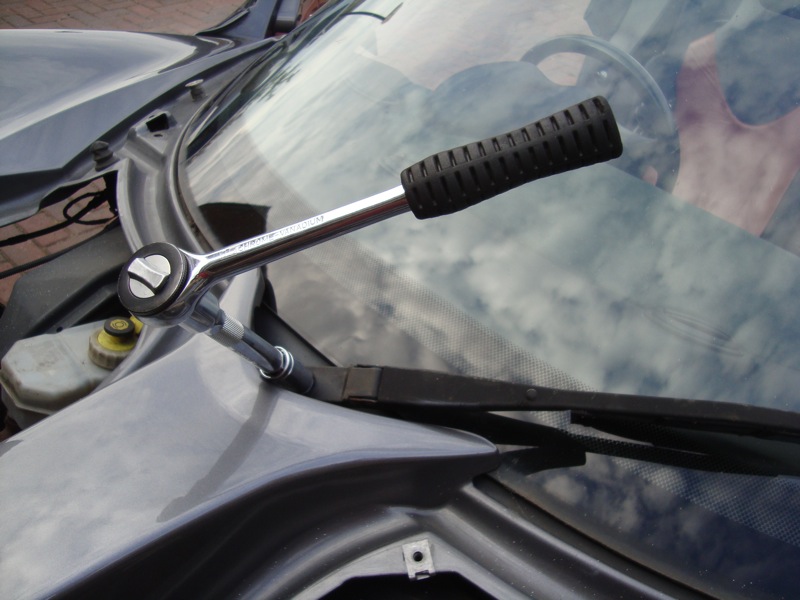
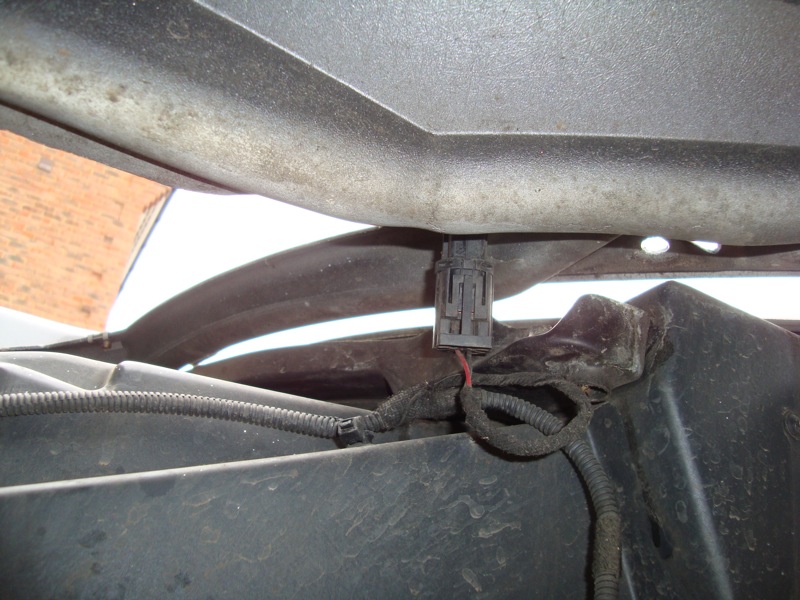
Step 10 - Wiper motor cover
Philips screwdriver
This is an easy one, just two screws to take off to remove the wiper motor cover. This helps you get access to the nuts under the clam shells' spine.
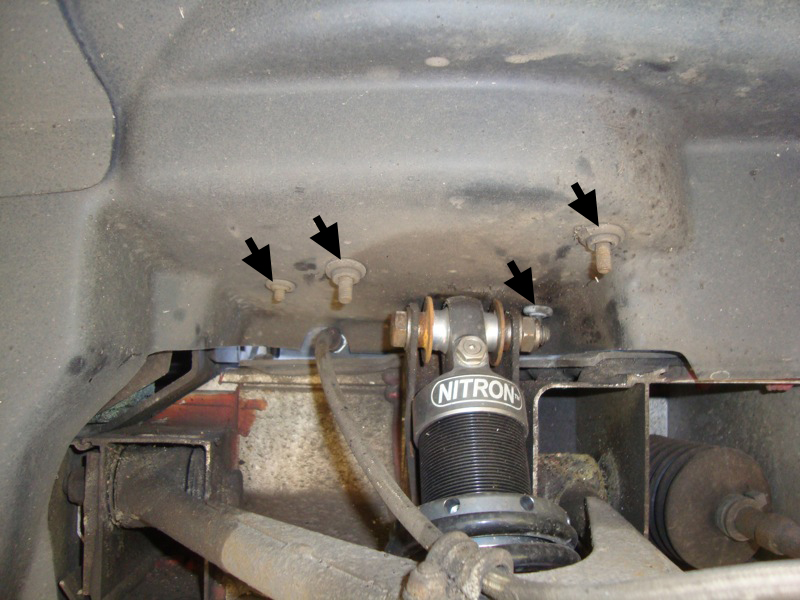
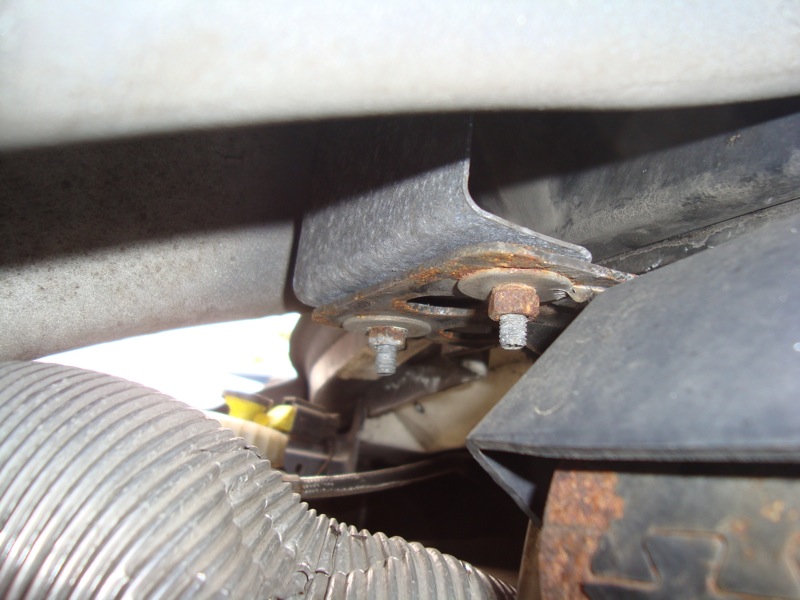
Step 11 - Clamshell spine nuts
8mm socket
These are a little fiddly to reach but with the wiper motor cover off I was able to get the mini ratchet in there with an 8mm socket on. It took quite a few turns to get them off, and make sure you don't drop the washers or the nuts when they come off, as they could fall straight under the heater unit.
Step 12 - Remove windscreen wiper
13mm socket (IIRC)
This is just easy to remove (depending on whichwiper you have fitted). I have the original factory fitted wiper and I had bought a new one to replace it as it was getting a bit rusty and the blade needed replacing as well. Even if you are not replacing the wiper, it may be easer to take it off anyway to get better access around the whole clam.
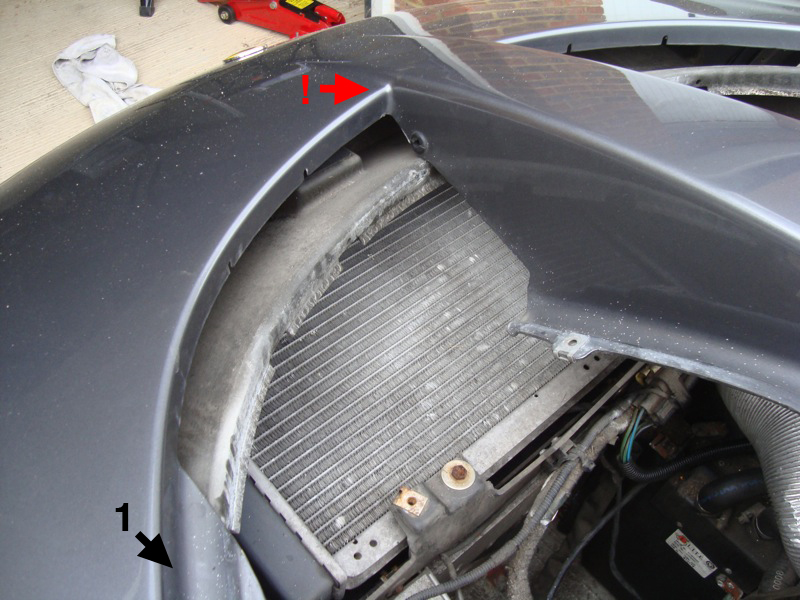
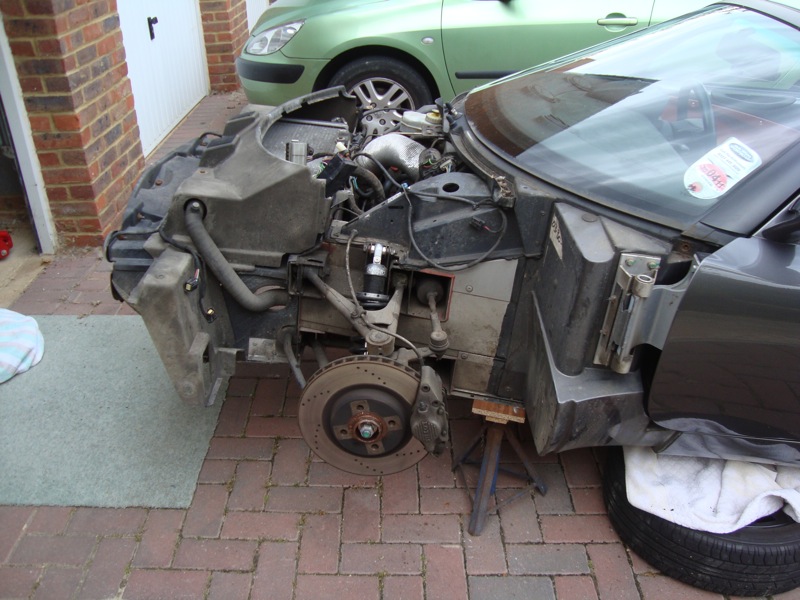
Step 13 - Front corner fixings to radiator panel
8mm socket
There are two fixings to take out each side for the radiator panel. One attaches to the clam (#1) and the other attaches to the crash structure (#2). Both are fairly hidden, but easy to get at. The first one must be removed to take the clam off, and the other enables the radiator panel to move whilst you remove the clam.
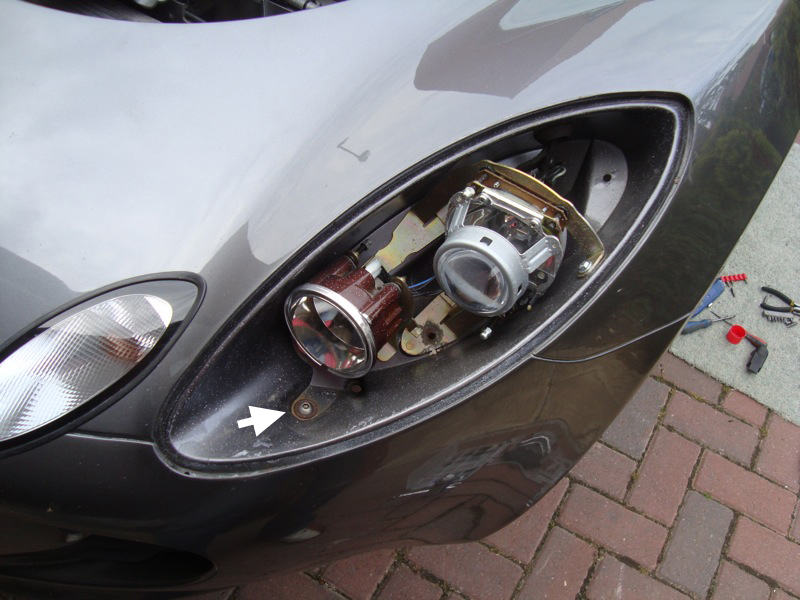
Step 14 - Remove headlight covers
Flathead screwdriver
Next take off the headlight covers. There are three screw fixings on the rear of the headlight inside the wheel arch labeled below.

When removing the cover, be careful not to pull any paint off the clam with the rubber seal.
Step 15 - Undo fixing inside headlight housing
6mm Allen key
Remove the Allen key bolt at the front of the headlight housing that fixes the clam to the top corner of the radiator panel.
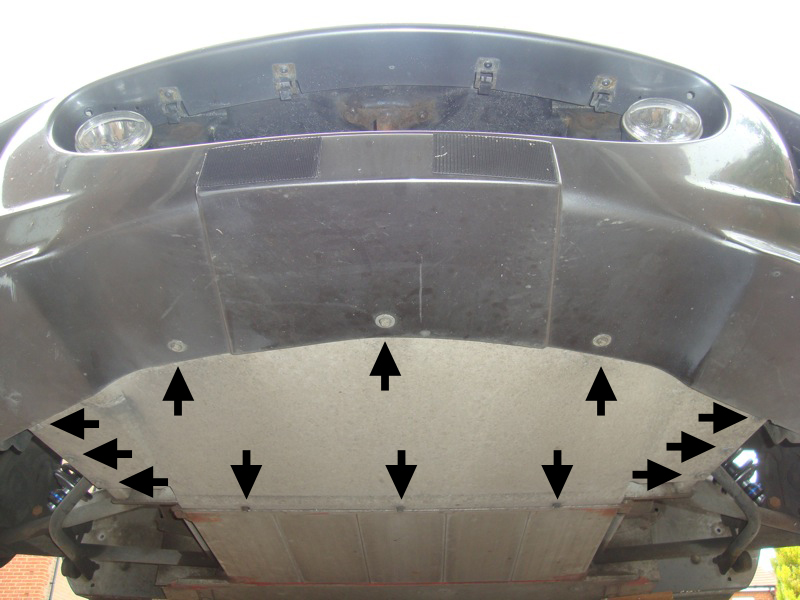
Step 16 - Remove front section of undertray
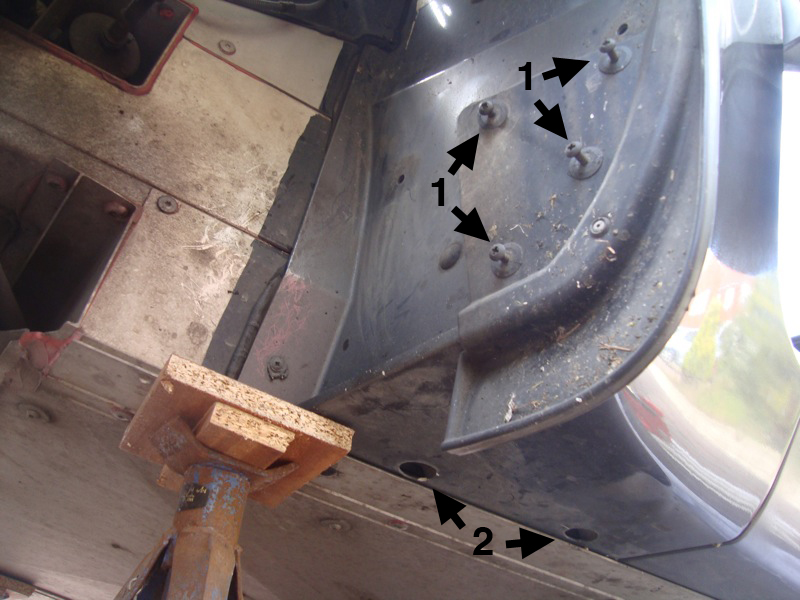
8mm socket
To remove the front part of the under tray there are twelve 8mm bolts. Remove all these and slide the tray forward, pivot down and take out backwards to remove.
Step 17 - Unclip all electrical components
Make sure all electrical cables are disconnected. The list is as follows:
Headlights x2 (four wires)
Front indicators x2 (two wires)
Alarm sensors x2 (located at the top of the clam near the inspection panel aperture)
Side indicators (already disconnected in Step 7)
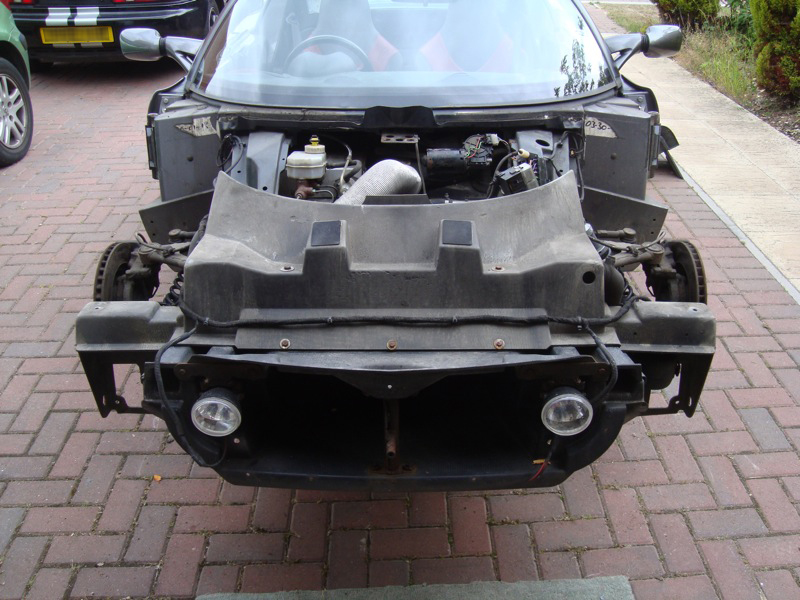
Step 18 - Lift clam clear
Before removing the clam off completely, gently lift each part of the clam so it moves clear and ensure nothing is caught or still fixed.
Watch carefully for any pincer points, and places that have to stretch over other components. One such place is the lower part of the clam spine, this is a particularly fragile point and is prone to fracture. Lift at the two drain ridges in the inspection panel aperture (#1).
When lifting the clam off, ensure you have towels laid on the floor under the nose. Pull the clam forward (#1). Once over the radiator panel pivot the clam up as if it were hinged on the floor (#2) (ie pull it up towards you). This pivoting motion will enable the clam to clear the lower 'wings' of the radiator panel without too much force.
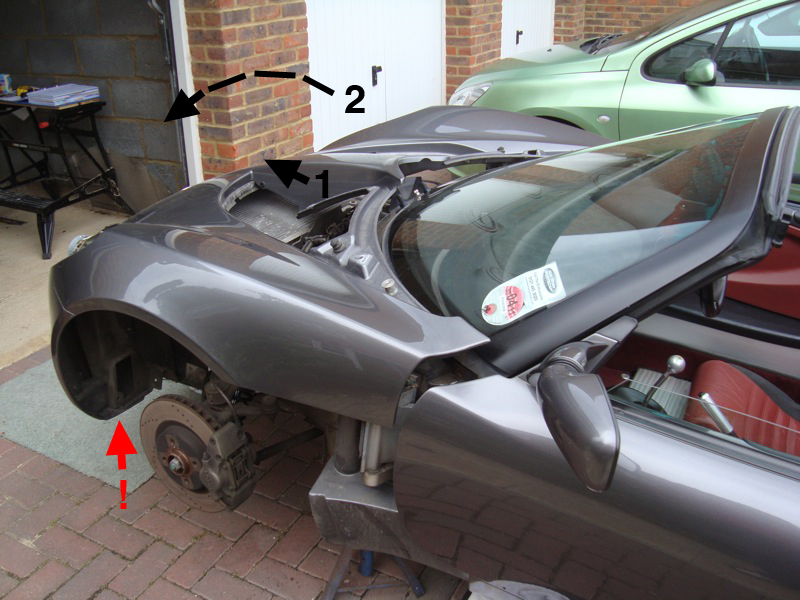
Be sure to clear the lower part of the 'wing' of the radiator panel. This is particularly tight and could easily cause the GRP to fracture.
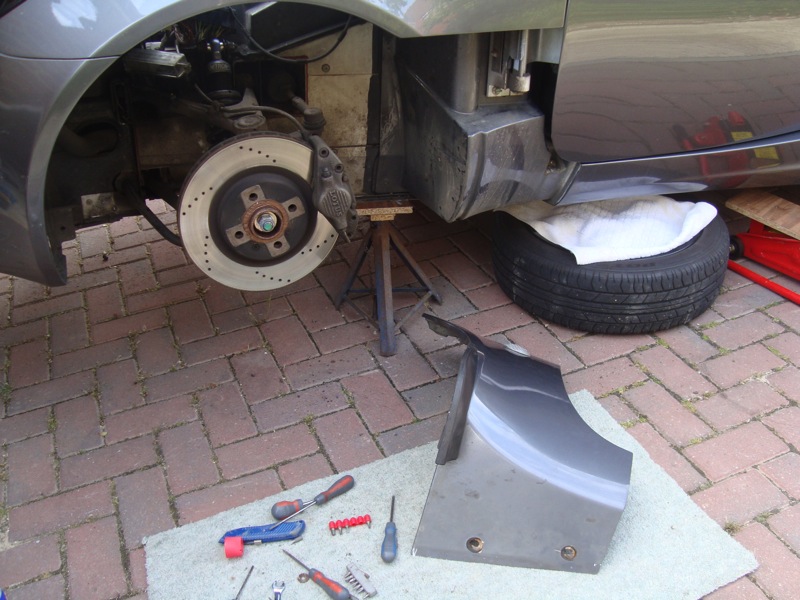
Also, make sure you have somewhere soft to sit it down.
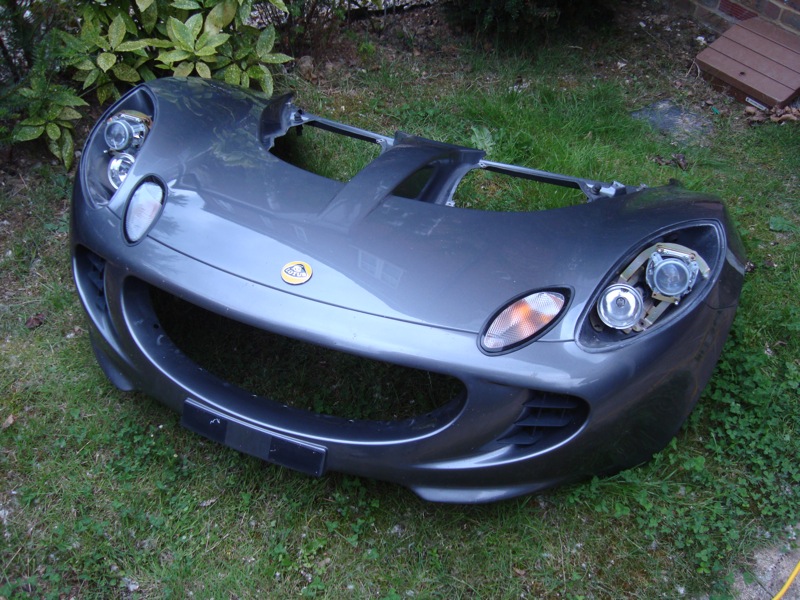
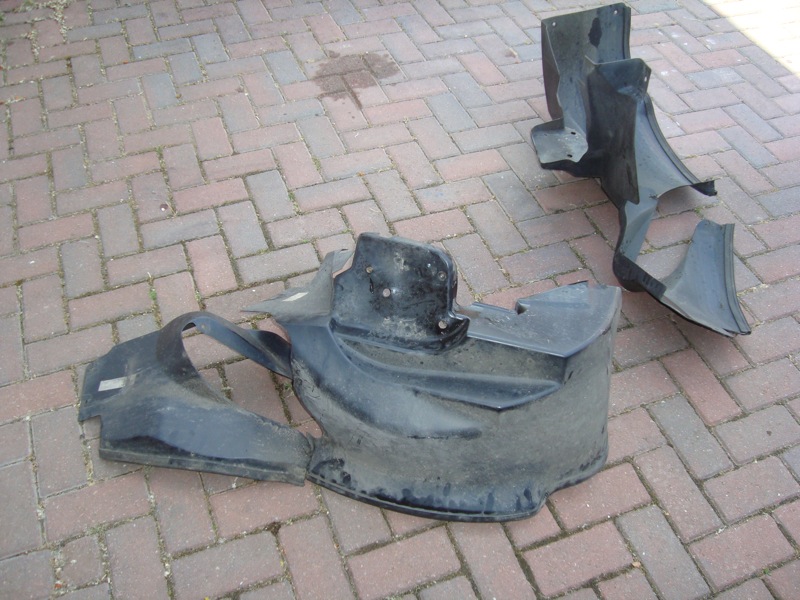
So, this is what you have left:
So there you have it, clam off and ready for whatever you were going to do in the first place. I'll add add few notes later regarding putting the clam back on, but for now here are a few extra points you should note:
-
I replaced a lot of the fixings once the clam was off, and copper greased any metal fixings. I bought spare rawl plugs, nuts, bolts, and washers and also replaced old and rusted C-clips around the front under tray. If you ever had to take it off again, you'll be glad you did this.
-
Once each part was off, I put each set of fixings in a separate compartment of a storage box, in a particular order, so I knew which part they belonged to and what order they came off in.
-
I stored the clam as you see it above, lying on the grass, covered up in some plastic sheeting, however heavy rain was forecast after a couple of days so I move it to the garage and stored it nose up balancing on my bike and resting on towels at four points. it seemed pretty safe, and I felt much better than nose down as recommended elsewhere. As the nose had been repaired, this was already a weaker point so decided to store it the other way up. This is no way a recommendation, but how I found it best to store mine. You should always try and store it lying flat.
-
When easing the clam up for the first time, be aware that the A-pillar fixing brackets, seen in Step 8 bend very easily within the large 'blobs' of sikaflex type adhesive. I assume these can move slightly to aid alignment of the clam. Be careful not to move these too much.
-
You will loose skin off your knuckles, so be ready with a few expletives!
It is pretty much the reverse to refit the clam, but I will add a few notes in due course, of my experience.
5 Comments
Recommended Comments